RC Aircraft
Pico Goblin FPV

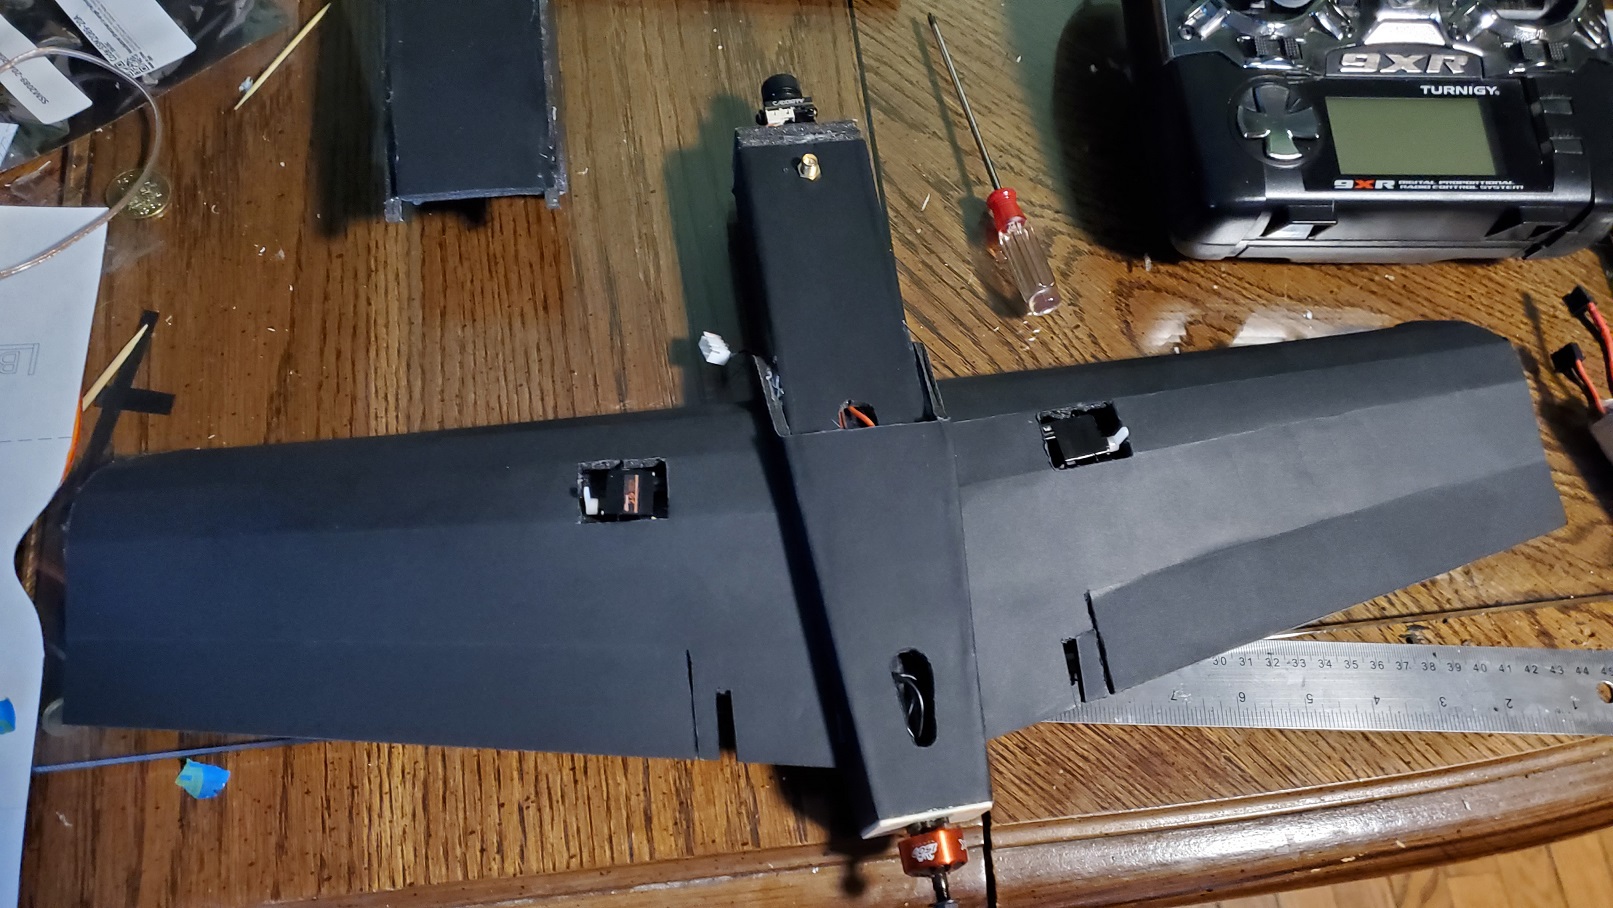
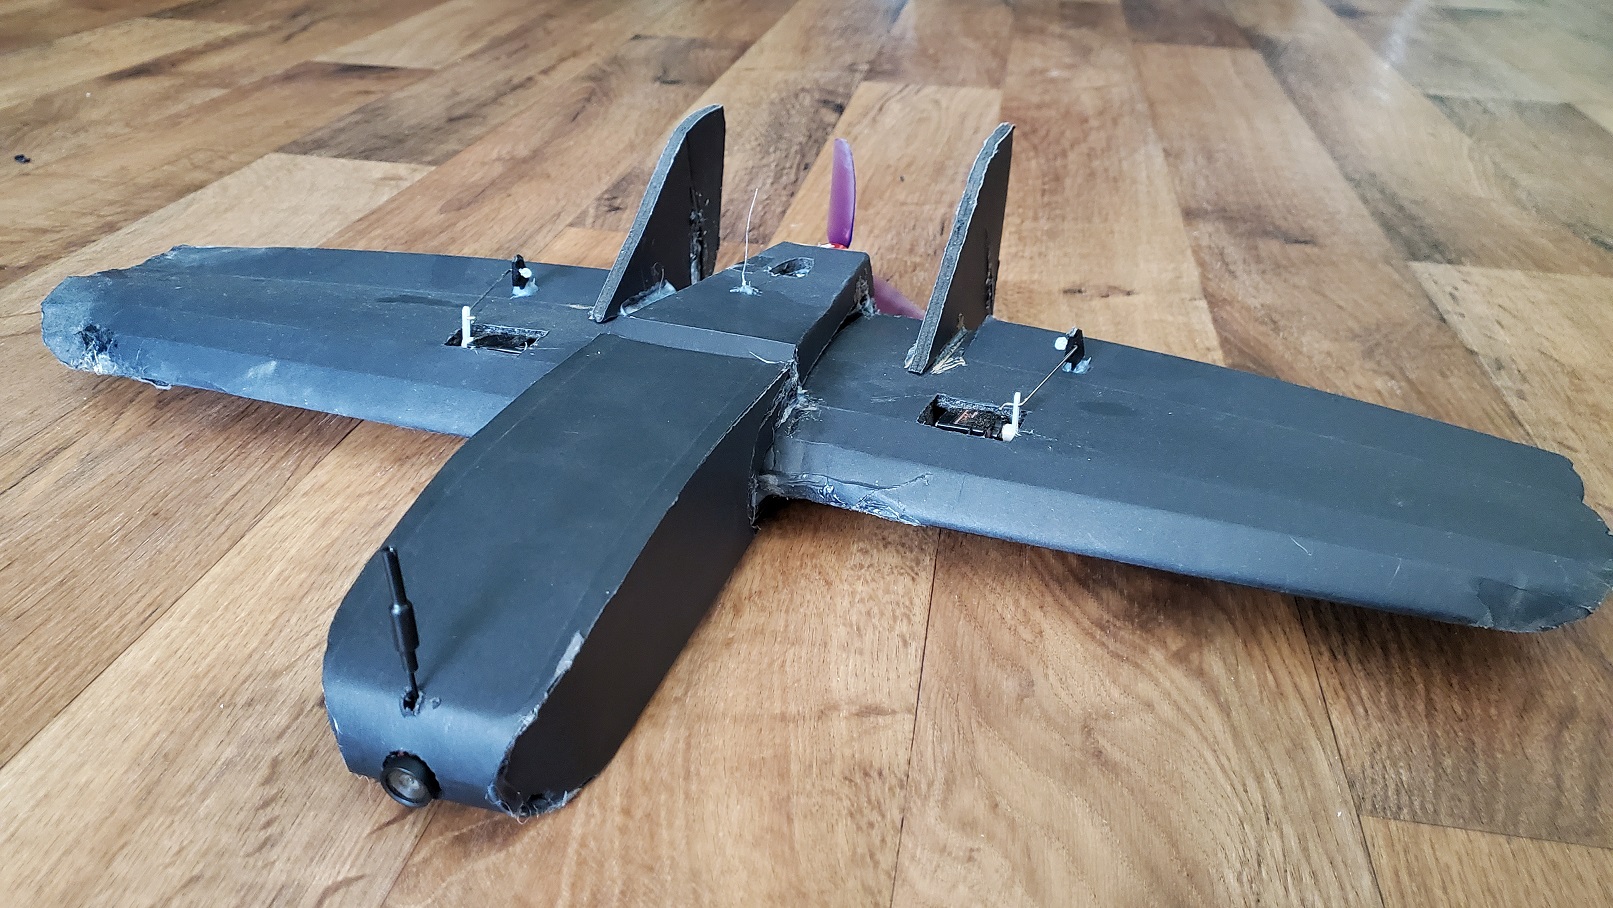
Wanted to try to build the FT Nano Goblin, which is the Flite Test foamboard version of the Strix Nano Goblin FPV drone. However, I wanted something slightly smaller, and found in the forums people were printing the plans out at 75% size with good success. So I reduced the original plans to 75%, but then realized that this doesn't take into account the foamboard itself is still going to be 100% size, so I had to make some adjustments. When doing the fuselage cover, it didn't fit right, so looked and found other plans online and decided to just print out that. However, the size was off. Apparently I ended up printing it at like 66% size, not 75%. So I just figured it out and created the new cover that would work. This thing is really, really small - 50 cm wingspan. Since the foamboard size was going to affect the curvature of the wing airfoil, I didn't know if this thing would even fly. There is hardly enough room for all the hardware, the battery just fits in the canopy area diagonally, and as such doesn't require securing. There's no way to make it any smaller than this.
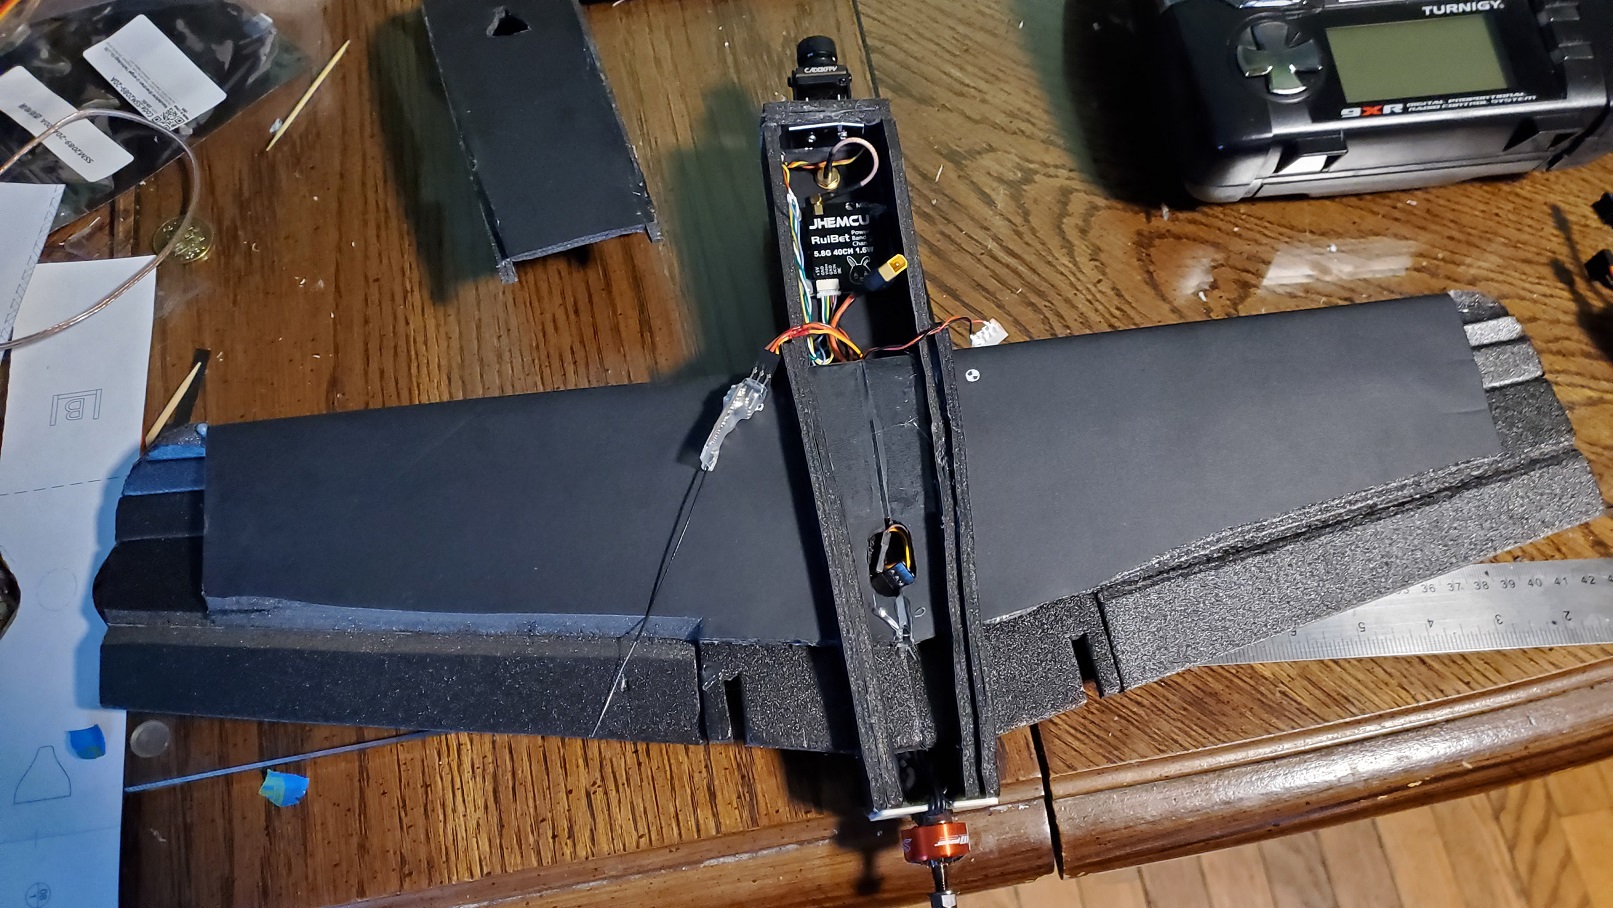
For attaching the camera and the antenna, I used some plastic card around the screw holes for reinforcement, since just the paper and foam is way too soft. For the first test flights, I decided to remove the antenna and just tape a weight of the same weight in place instead so if it crashed, it wouldn't destroy the foam where it was attached.
I have an ELRS receiver and a PWM module that I was thinking about using with this, but honestly, it doesn't make much sense to do so given how small the battery is, which means I have to run the VTX at it's lowest setting just so I can get a good five minutes or so of flight time. I'll save that for my next fixed wing FPV, the Heewing.
Pico Goblin 2.0
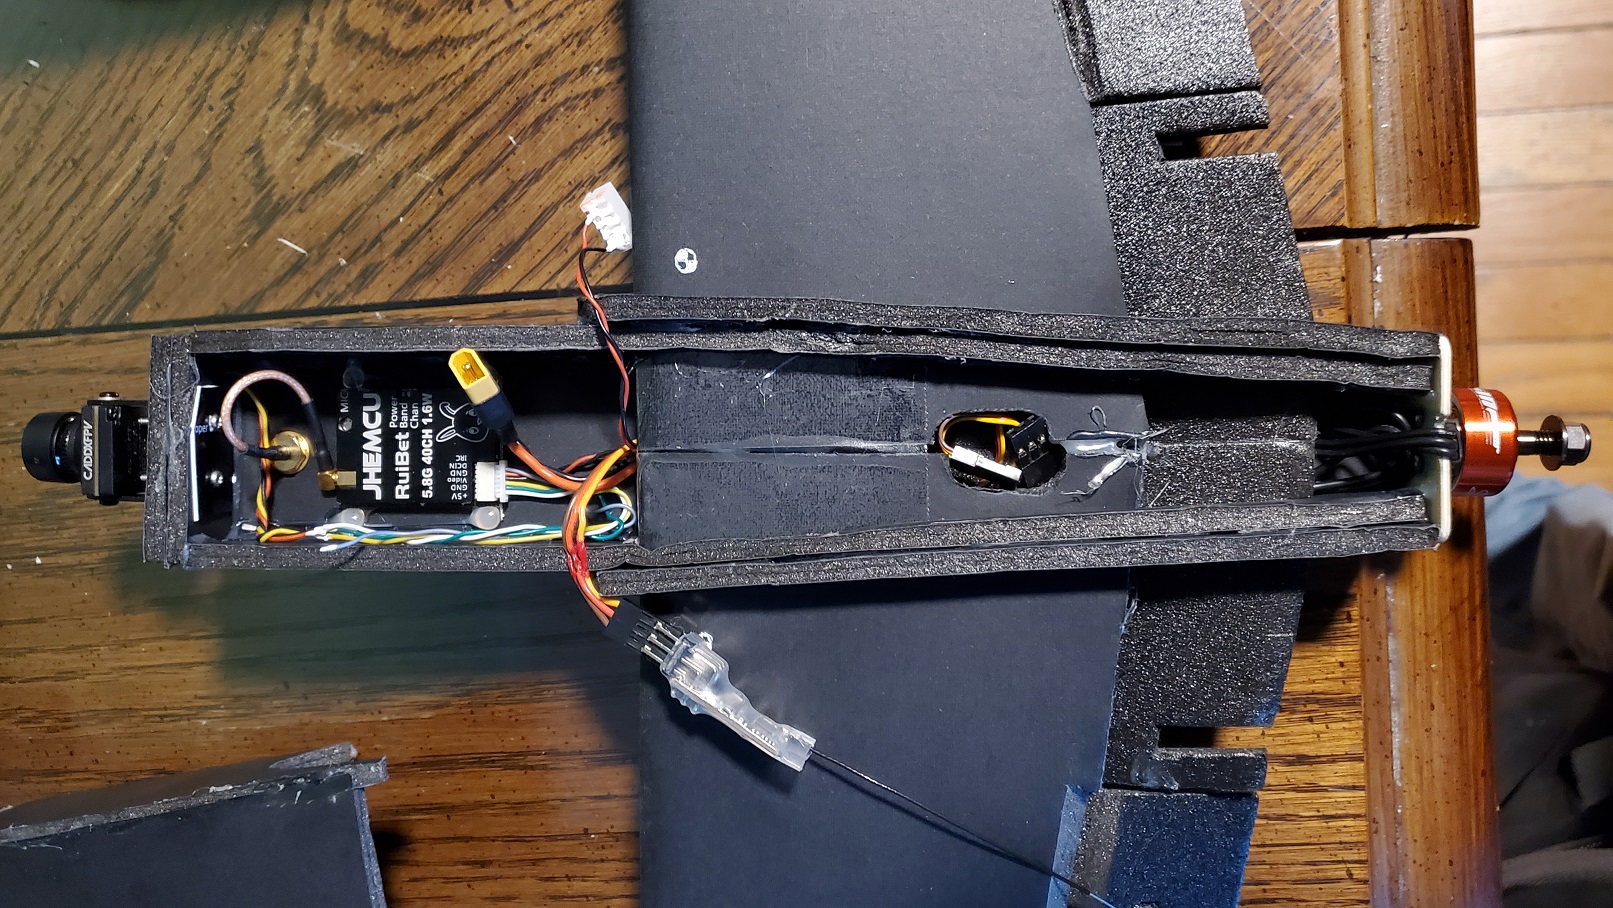
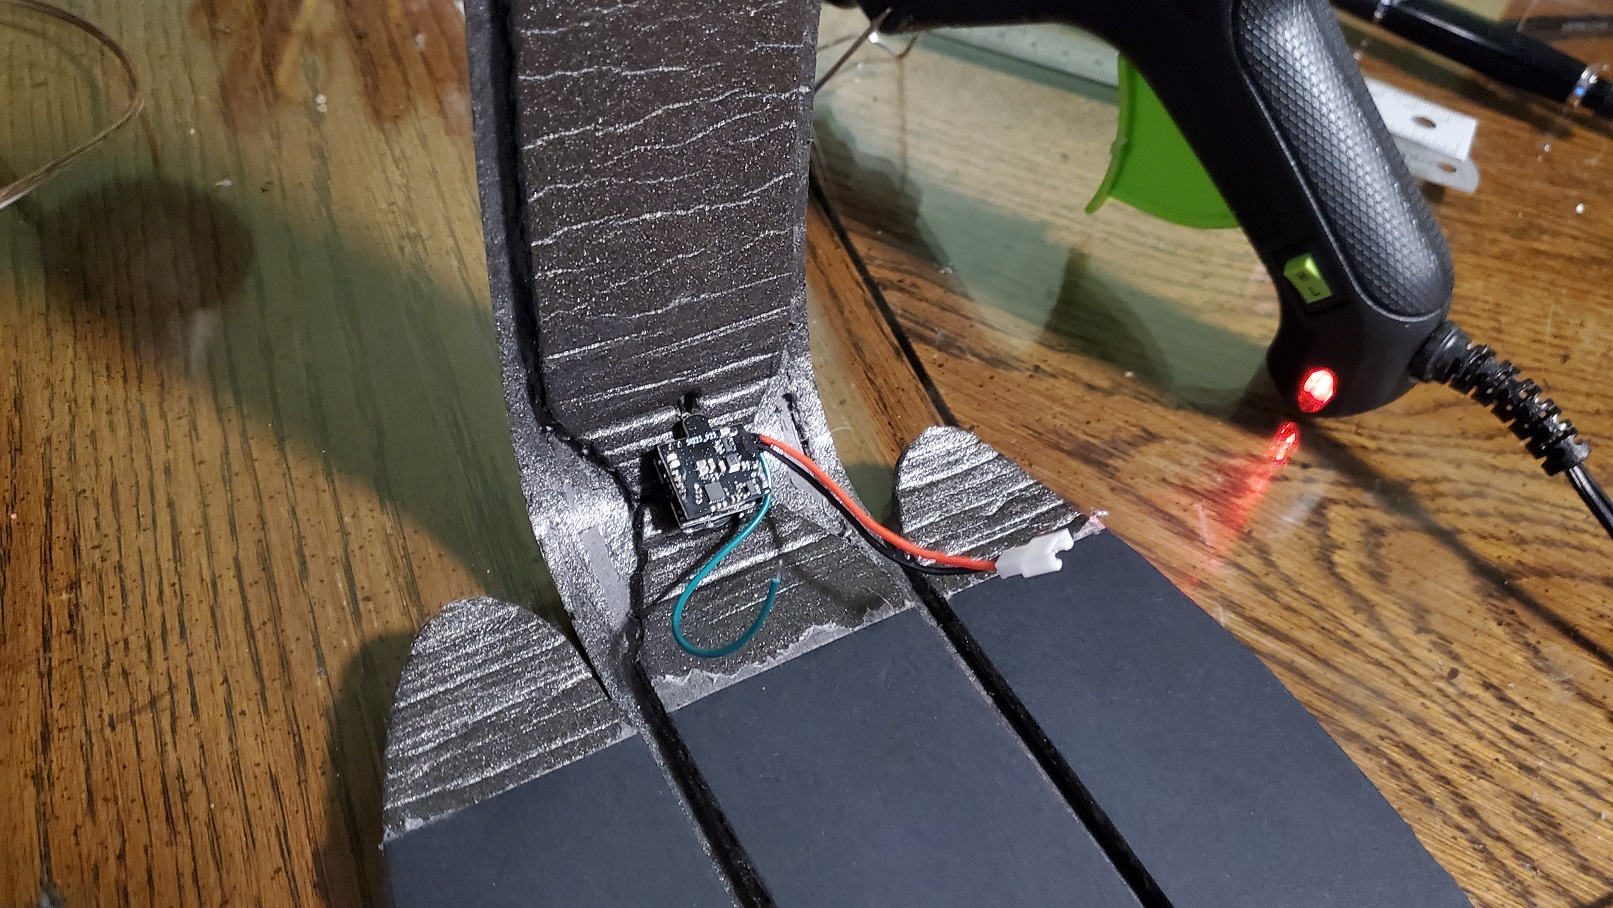
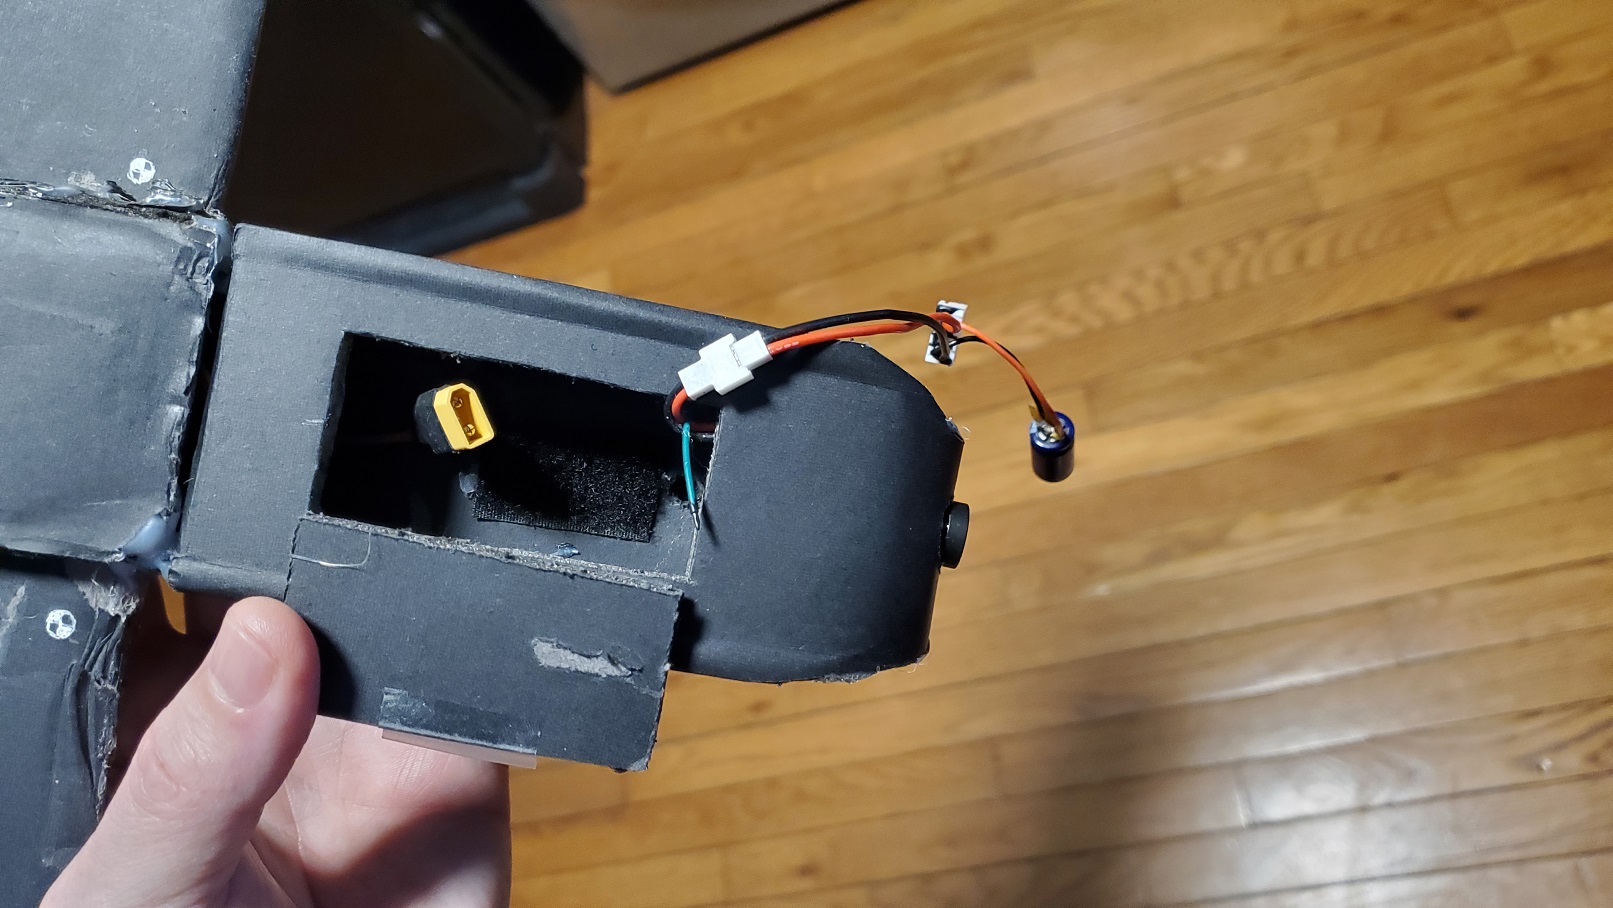
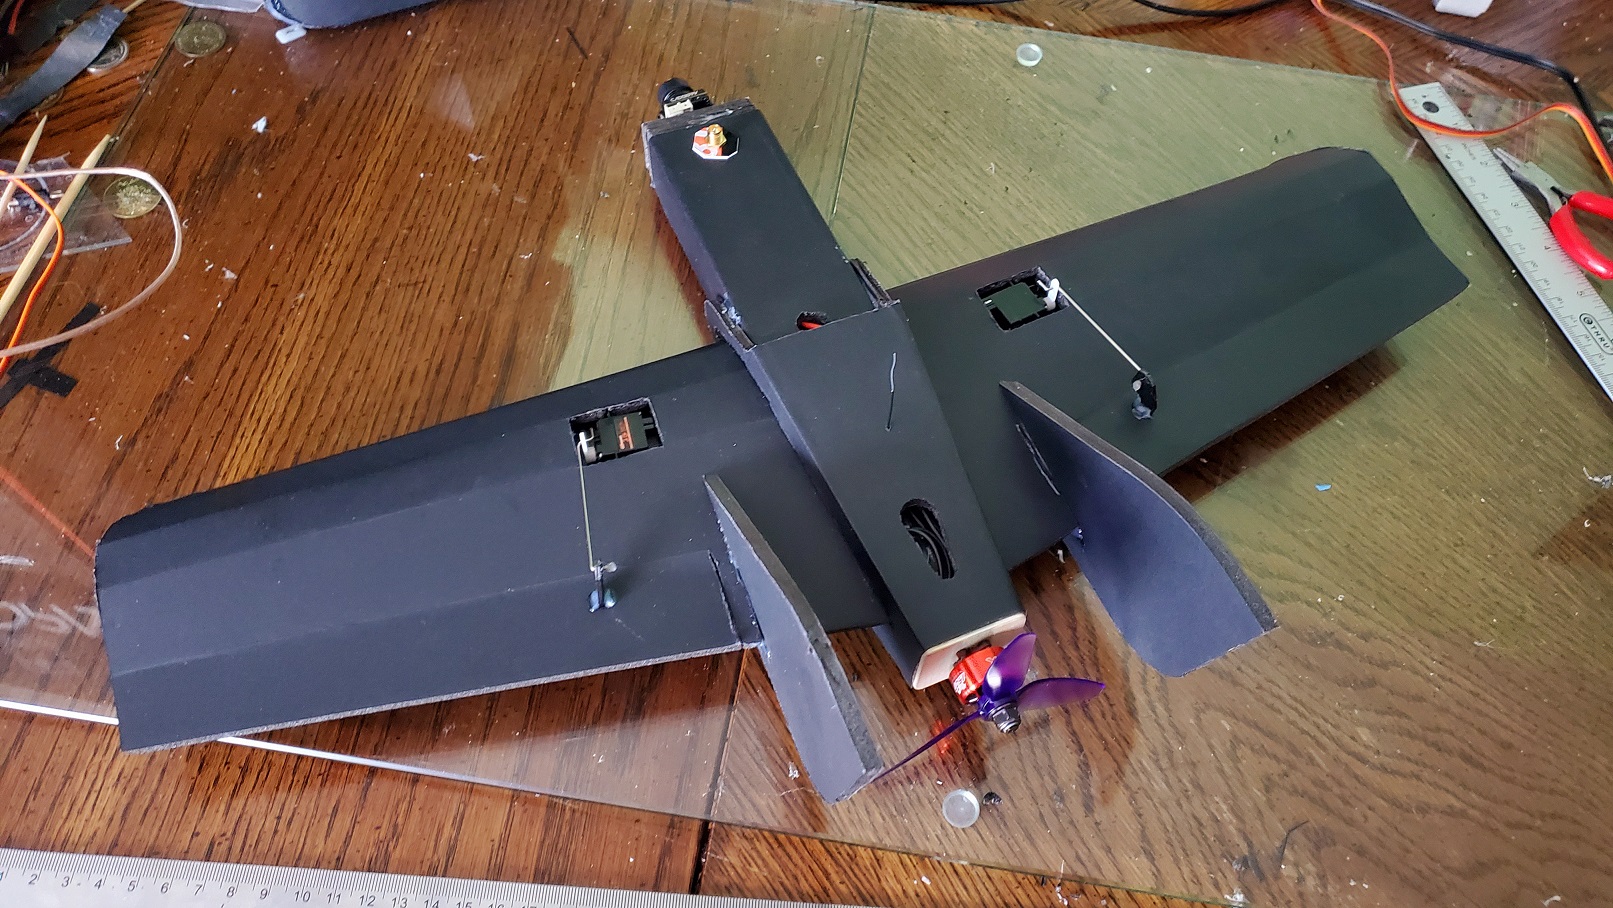
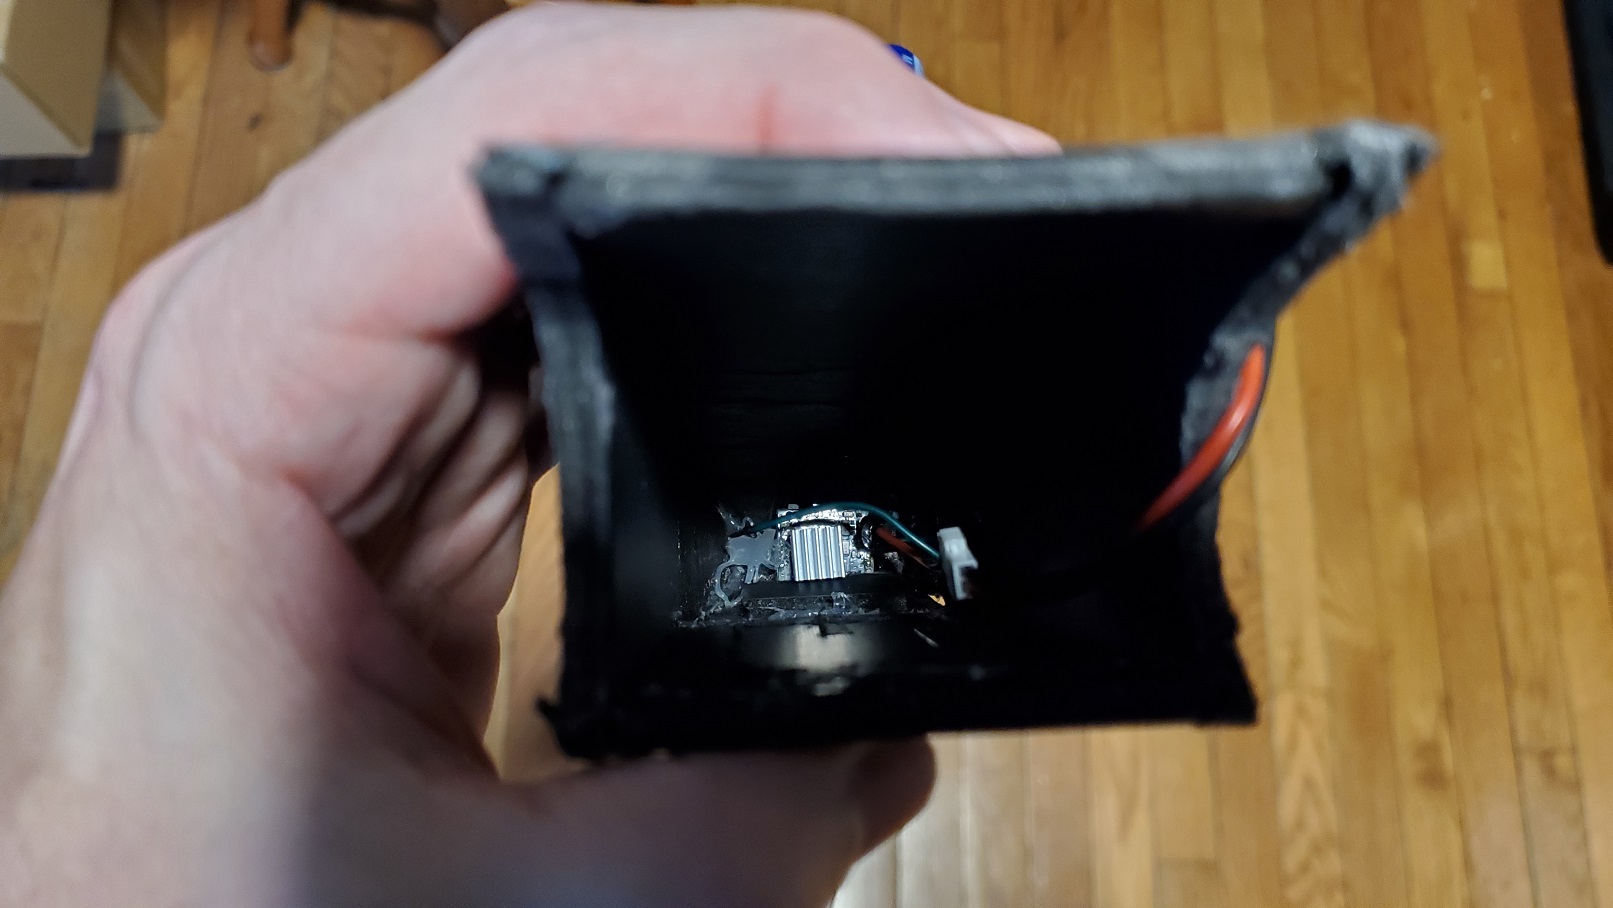
After finding out about the Tiny-Whoop VTX and Camera combos you can buy separately (see /rcair/microbat for details), I decided I wanted to use it in the Pico Goblin, and pull out the existing camera, VTX, and lollipop antenna to use in another plane. It's honestly too much transmitter power going to waste for this little "almost disposable" foam board plane that isn't using a flight controller or even an ELRS reciever, so it isn't meant to go all that far out anyhow. I found out by doing so, I was saving a whopping 18 grams of weight, and because of this, would require a bit more weight in the nose, so I just increased the battery size from 500mah to 700mah to make up the difference, resulting in longer flight times. I re-did the fuselage so now installing the camera/VTX/antenna was easier and I had way more room in the cockpit area.
I also added a 25v 1000uF electrolytic capacitor to reduce video noise. I also added a small heat sink to the back of the VTX as well as put some small holes on both sides of the cockpit to allow some cooling, as the board becomes too hot to touch on even the lowest setting of 25mW.
I could probably get away with using the same 1306 motor and prop combo like I used in the Mini Chiroptera, which would lower the tail weight and allow the use of a 500mah battery again, but I really enjoy the speed of the 1507 on this thing.
Pretty Clouds
- The Dreaded Two-Second Maiden
- Second Try
- Third Try
- Fourth Try
- Good Take-offs and Landings
- FPV Flights
- FPV Maiden
- Prairie Hill
- Dos Arboles Crash
- Dos Arboles Windy
- Perfect Landing
- Tree Gates
Plans
- Flite Test Nano Goblin build video
- Original Flight Test Forum Post
- Tiled plans for standard US paper from that post (Print at full size)
- Another 75% Nano Goblin Mashup
Parts List
- Cadex Ratel 2 v2 FPV Camera (Pico Goblin 1.0)
- JHEMCU RuiBet 3016W 1.6W Video Transmitter (Pico Goblin 1.0)
- 5.8G FPV Antenna (Pico Goblin 1.0)
- VTX-camera-antenna combo (Pico Goblin 2.0)
- 1507 2680kv Brushless Motor
- 500mah 3s Lipo HV Battery (Pico Goblin 1.0)
- 700mah 3s Lipo Battery (Pico Goblin 2.0)
- ESC 12 amp
- FS2A Mini Receiver
- 2g Metal Gear Servo x2
- 4043 4 Inch 3-Blade Propeller