Destiny Ghost Project

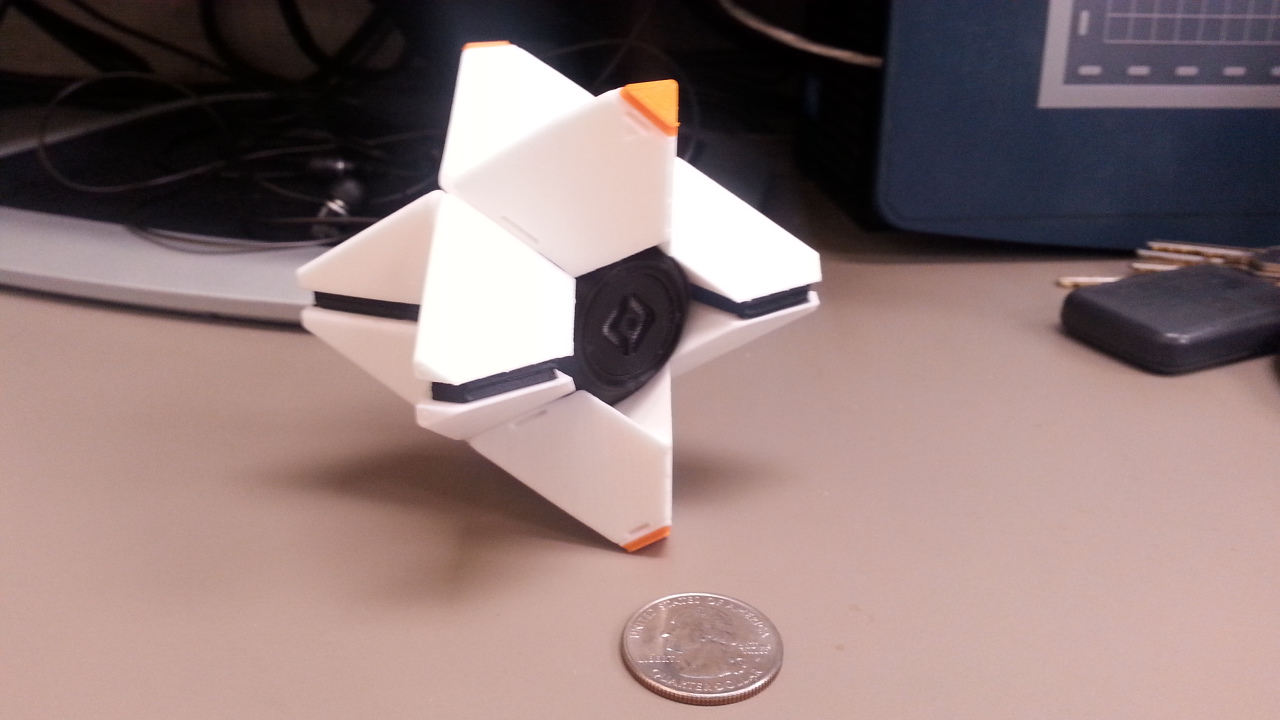
Just a small write-up of the Destiny Ghost project I wanted to try out. I've recently been employed at the local university, and as luck would have it, we have access to the school's media lab, which includes 3D printers. Even luckier still I reside in the same building as the lab. So after running a test print (with a Companion Cube, of course), I felt it worked extremely well so thought I would try something a bit more complex with more pieces.
Online I found a great project at thingiverse.com that was made of multiple pieces, was "life-size", and could even light up. This was done via a small tea-light candle LED module you can get for cheap on ebay. The only other things needed were glue and small neodymium magnets (again, cheap on ebay). Here is a link to the project.
I had to do the project over the course of three days. The two sets of wing pieces each took 5 hours, so two days there. The black pieces took 5 hours, so another day. The other small pieces were done in under a half hour. The others who did the project said they had trouble printing the pins that hold the inner shell together, and rightly so: for some reason, the pins are just put in the 3D file as four sets of two, and each set is set a quarter inch above the other. In mid air, with no supports. So yeah, not goint to print. I simply let the machine print the first set of two, then when it started to go above, I interrupted the print and started another, until I had four sets.
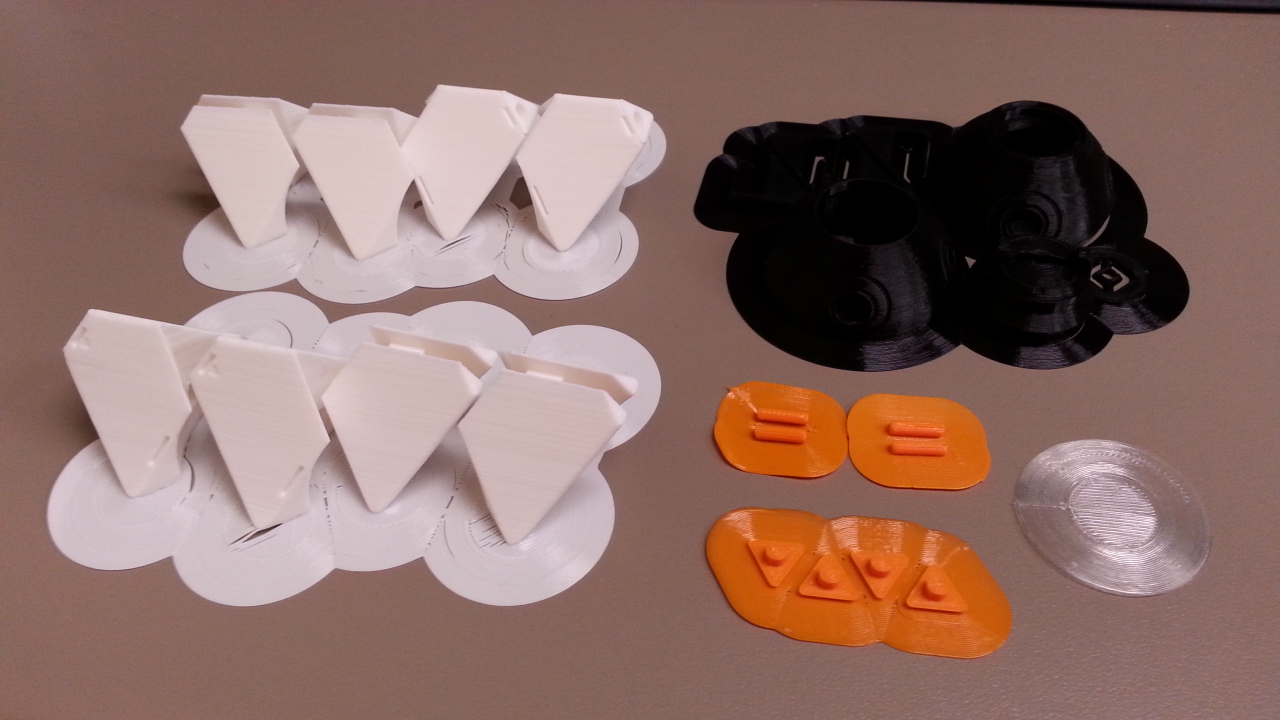
The thin layer of plastic that surrounds each of the sets is called a brim, and it's used to help adhere the print to the printing bed. It's very thin so it comes off quite easily by just pulling it off, though on some of the pieces an X-acto knife was needed to either clean up or separate properly.
The pins needed to be stripped down a little in order to fit inside the appropriate holes. The tea light LED fit perfect, and the turning switch worked great. Glueing the magnets in the correct spots is a bit tricky, since you need to make sure the magnets will attract and not repel when putting it together at the end. With the stack of magnets, I took a Sharpie and marked a black dot in the middle of all the top sides (let's say N pole) of the magnets in the stack. Then when gluing them to the inner shell, I glued with the dots facing up. On the wing pieces, I glued with the dots facing down. That way i knew they would all be in correct alignment when all was said and done.
I'm happy to say it came out way better than I expected, seriously something that rivals a professional model that I could see putting down money for on say the Bungie store or something. If you have access to a 3D printer and are a Destiny fan, there's no reason not to give this a try.