Metroid Prime
This is a guide for a fun route showing some of the more popular sequence breaking tricks and techniques. It is for those who've beaten the game previously and are looking for a new challenge. The route I describe is not fixed in stone; deviating and finding other pickups or whatever is totally up to the player. I try and reference a few areas where picking up something is optional, or where not picking something up will make things more difficult later on. This run is being done on the standard North American 1.0 version of the game - other versions fixed some of these glitches or added extra barriers, etc., so if you're following along make sure you're using the same version.
"Why?" you ask? Well, for one I love this game and started getting back into it again recently to try these tricks as I've never done them myself, so it's a new way to play that's really fun. I love the technical tricks done in games to achieve things that are tough to pull off. For another, all the videos online are mostly older ones, and as such, the video quality is quite poor, some being so dark or washed out it's hard to see exactly how things are done. Using an emulator I can get amazing graphics (albeit with some minor graphics glitches now and again) that are sharp, vibrant, and in widescreen HD. Also, obviously it's quite a bit easier to practice some of these things in an emulator when one can simply load save points at will over and over again.
The best part about this run? No more having to even touch the underwater wreckage area in Tallon Overworld or any other underwater areas for that matter (save for a small part in the Tower Chamber). I've never been fond of those parts; even with the Gravity Suit, it's just slow and not much fun.
For the entirety of the run, never completely scan anything (except where necessary like elevator access or force field and turret disarming). A few tricks employ scan dashing, and you won't be able to scan dash as easily if you've already scanned the same object type previously - you'll have much less time to release the lock before the screen freezes to read information about the target.
 Space Boots (Landing Site): Do a scan dash from the top of Samus's ship using a vine spore in the distance. To scan dash: grab a lock on the spore that's out of range. Hold the left thumb stick to the right then double tap the jump button. You need to hit the jump button immediately after holding the thumb stick right; waiting too long will end up with Samus just walking right off the ship. As soon as you've started to dash (immediately after the second jump button press), release everything - L-trigger lock, jump, and thumb stick.
 After the space boots, head to Chozo Ruins, which is the lower door to the right of the ship (if you were standing on the ship looking toward the front of it). Get the missile expansion in the half pipe with the ghetto jump, backwards seems to work best. Get another missile expansion via rodeo jump. Get the energy expansion nearby via ghetto jumping sideways and sticking to the wall.
Morph Ball (Ruined Shrine): head to the first door at the left of where you come in to the Main Plaza, use the acquired missile to open it, can then get the morph ball. Don't even bother with the boss, Space Jump allows access over the small wall. Head back to the Main Plaza.
Ball Bomb (Burn Chamber): Go to the door at the upper right of where you come into the Main Plaza, by the wasp nest. When at the Ruined Fountain, take the left door. Go straight to door on other side of Arboretum. Go to the door straight across (highest up) in the Gathering Hall to get to the Energy Core. Take the immediate left upon entering to get to the Burn Chamber to get the ball bomb.
Charge Beam (Watery Hall): Head back to the Energy Core and explode the toad to open the door via the bomb slots. Going through the open door will get you an energy tank if you like by taking the lower route to the Furnace (recommended, useful for more wiggle room during the Flaahgra fight as well as for the Sun Tower infinite bomb jump). Head back to the Gathering Hall and once there, can grab a missile expansion right above the door via ball bomb. Take a right - the door opposite of save station on the left - but before you do, make sure to fire a missile at the save station door so you can get in it later when doing the Infinite Speed glitch. Grab another missile expansion in Watery Hall Access via missile to the wall. In the Watery Hall, scan the four ruins to open the door at the end and grab the Charge Beam. Use the bomb to grab the missile expansion in the Dynamo.
 Varia Suit (Sunchamber): Go back to the Arboretum to get to the Sunchamber. Scan the 4 ruins to open the door at the top (or just do a bomb jump at the top).
 Fight Flaahgra to collect the suit. You can cheese him by putting a bomb next to the bomb slots. For the second bomb slot, you can land on the right of the slot; for the third and fourth, land on the left before morphing and bombing. On the fourth bomb slot, make sure to land in the water before defeating the boss if you plan on doing the "floaty jump" method of getting the Artifact of Wild.
 After Flaahgra fight head to the Sun Tower. You can bomb jump right back up to get Artifact of Wild. On the way to the Sun Tower, in the Sun Tower Access, only break the top two crates for health - that way, when (or if) you make it back up you can break the other two crates for more health to fight the ghosts afterwards. You need to morph and get in the left groove, holding the thumb stick either down and left or up and left so Samus's descent is slowed, allowing the infinite ball jump trick to work. Unmorph at the peak of the ball's ascent from the last bomb jump when you're above floor level while holding up and right in order to make it out (this is actually the hardest part - the timing is quite strict). Acquiring the artifact here is not strictly necessary, though it does save a bit of time, so don't waste too much Energy doing this, else you could die fighting the ghosts and have to start from before beating Flaahgra. If you can't make it you'll need to head back and pick it up at some point later - you will, however, absolutely need to fight Thardus later to aquire the spider ball as well as grab the super missile in the Observatory in order to get back up as the original door in gets closed off with impassible vines. If you're going to practice this, it may be a good idea to pick up yet another energy tank via the Hive Totem first so you have more energy to play with - you can get there by going to the door at the back left of where you enter the Chozo Main Plaza. It's also a good idea to scan the 4 ruins and open the top door in the Arboretum first and then going back to the Gathering Hall to save again so you don't have to do that part all over again every time.
 There is another method that although is slower, is much safer to pull off. The other method, utilizing the infinite bomb jump, leaves little room for error, and if you don't pull it off, you end up having to start over from before the Flaahgra fight. First and foremost, you need to fight Flaahgra using the proximity to bomb slot cheese (as shown in the previous video), and you MUST fall into and be in the water when the last bomb defeats the boss. Because of this, you won't be able to pull this trick off beating Flaahgra the legit way.
After that you need to make a series of jumps to go out of bounds of the map. The second area to jump on next to the column is very finicky, so try to double jump late so as not to fall off. From there you jump to the near light shield. You then jump up on top, then bomb ball to raise up past a barrier, then walk straight up to the hole at the top, jumping at the end to make it over another invisible barrier. If done correctly, you should fall straight down to underneath the map.
At the bottom of the map, make sure to not ever morph into a ball, else you'll fall out of the map completely and have to reset. Make your way to the water so that you see the blue and the water on the visor animation. Now what's known as "floaty jump" should be enabled. Jumping from the under the map is hit and miss, so keep moving and jumping until you finally rise up. Use the floaty jump to jump up and on part of the map, then out and up again, out and up again, until you're high enough to do bomb jumps that will take you higher and higher until you fall back into the map. It may take some time to find the right spots above where you can actually land and jump from. When falling back in, make sure to not touch the water, else it will cancel the floaty jump glitch.
Make your way out the door, but again taking care when going out the hallway not to touch any water - the path on the right is the best way to avoid it. When at the Sun Tower, simply run off the end and land on the ledge below, turn around, and jump back up, thanks to the floaty jump. Proceed back to the Sunchamber, and on the way go ahead and touch the water to cancel the floaty jump. Then fight the three ghosts to pick up the artifact.
Need to head to Phendrana Shorelines to get the Boost Ball and Wave Beam. Need to go thru Magmoor to get there. Go back to Sun Tower and take the Magmoor Caverns North Transport. If you want to pick up both an energy tank and missile expansion quickly, go straight past the transport, and keep going, you'll grab the energy tank and then the missile expansion you'd normally get from having to beat the Hive Totem, but don't have to since going backwards. Head back to the transport when done.
 When entering Lava Lake, quick fire some missiles at the column to get the Artifact of Nature.
 At the Triclops Pit, can missile another column for the missile expansion. Can also get another missile expansion going underneath the floor via morph ball to the right door. The left door takes you out.
 At the Monitor Station, take the door to the right up on the bridge. You can use the rocks to get up there quicker after taking out the one turret shooting at you.
 You can also do a scan jump to get up there even quicker, but it's quite difficult, requiring a rodeo jump after scan jumping.
 Here it is even faster, without turning to look.
This heads to Transport Tunnal A (energy tank there via bomb jumps) which takes you to the Phendrana Drifts North Transport.
 Boost Ball (Canyon Entryway): At Phendrana Shorelines, take the door straight across, (above the save station). You can do a ghetto jump to to jump over the wall in front of the door in the Ruins Entryway, or can just go around. Take the right door at Ice Ruins West to the Canyon Entryway to get the Boost Ball. Head back to the Phendrana Shorelines.
Wave Beam (Chapel of the Elders): When back at the Phendrana Shorelines, after watching the Meta Ridley shadow cut scene, head to the left door to head to the Chapel of the Elders to fight Sheegoth (just use ball bombs) and collect the Wave Beam. Make sure you DO NOT shoot the crates to the right of the door when you walk in, those are needed for the next trick.
 After beating Sheegoth, can do a trick called the Infinite Speed glitch. Bascially it involves trapping the morph ball into a space to allow spinning it so fast that it actually appears to stop spinning. After awhile a value becomes too high and causes and overflow in the game, which causes the shell of the morph ball to disappear. At that point, whenever you boost, you will touch/pick up any pick-ups nearby. One has to be careful not to unmorph however as it will really mess up the screen (unless you're on the Wii, in which case you can simply unmorph without issue). The only safe places to unmorph are elevators or save stations where a cut scene starts.
After the fight, shoot the door to activate it (as we won't be able to shoot it later as we won't be able to unmorph). Fall behind the crate next to the wall on the left, and then aim across to the other corner of the room. Morph into a ball, then move the thumb stick to make it spin. You need to find a point where the spinning pattern starts slowly changing until it flickers and seems to stop (as it's going so fast). If you can't find the point, simply unmorph, point at a different spot, morph and try again. After about a minute the shell of the ball disappears. At that point, ball bomb to break free, then double bomb jump to the door to leave. (Be careful - if you bomb jump and it's too close to the door and you miss the ledge, the door will open then close and de-activate, and you cannot open it since you'd need to shoot it with a wave beam again and you can't unmorph.) DO NOT boost here, as it may trigger the door to reset to closed again and you won't be able to get out. In the next, boosting in there should pick up the Artifact of Sun. Make your way to the Magmoor Caverns West Transport, boosting again before the door out of Phendrana Shorelines to pick up another missile. When at the transport you can unmorph safely.
 Go on to the Monitor Station, and if you're doing a speedier run and/or don't plan on picking up the Ice Spreader (not a necessity) or the extra power bomb, head to the top and scan jump directly across from where you came in to get the Artifact of Strength in the Warrior Shrine. Otherwise, can pick them both up later as well as the Ice Spreader all in one go (though this will lengthen your run). Go back out and take the door directly below to the Shore Tunnel, and keep going until the Tallon Overworld West Transport.
Pick up the missile expansion in Transport Tunnel B in Tallon. Go to the Root Cave, use the next door up to the right and head to the Chozo Ruins West Transport.
 Head to the Main Plaza, and take first left to grab the Artifact of Lifegiver in the Tower Chamber. You can pick up two more missile expansions on the way via holes in the wall in the Ruined Shrine. Use a scan jump to get past the Ruined Shrine to get to the purple door. In the Tower Chamber, go underwater toward the door, don't need Gravity Suit, just ghetto jump underwater. You can grab the Wavebuster here if you really want, but it's pretty useless as it just eats missiles.
 Power Bombs (Magma Pool): Head to the Magma Pool to do the speed ball glitch and get Power Bombs (Door straight across when entering the Ruined Fountain). Basically you drop between the crate and the wall, morph into a ball, and start spinning until it spins very fast and oddly to where it stops. After about a minute it turns into just the white inner core. Use a ball bomb to break free, then boost right away to pick up the Power Bomb. If you're not playing on a Wii, head to the save station in the Gathering Hall by going back to the Ruined Fountain and taking the door to the right and unmorph at the save station. Get through the Arboretum by bomb jumping up to the door in the water (just hit the bomb button three times quickly, it will knock you out of the water). Do not boost on the way there, else it will mess up the camera at best, lock the game at worst. If you are playing on the Wii, simply unmorph and morph back. Again don't boost or even move around much (it's hard to see where you're going anyhow), just unmorph, otherwise you run the risk of locking up the game.
 Head to the Furnace by going to the Energy Core and using the door straight across from the Energy Core Access. grab the energy tank if not already via the lower route. Take the high route via the spider ball track, use the left part of track to glitch up by pressing against it and jumping.
 If you have a later/patched version, you can still bomb space jump up to the access entry. From there take the ball tunnel to the Crossway. Enter the missile door in the back.
 Ice Beam (Reflecting Pool): Head to the Elder Chamber in Chozo (need Wave Beam, Ball Bomb) by doing a special jump to get to the bomb slot on the wall, then heading to the Reflecting Pool.
 X-Ray Visor (Life Grove): From Reflecting Pool, head thru the white door to the Tallon Overworld South Transport. Head to the Great Tree Hall and reach the top via jumps on the spider pole. The last ghetto jump requires jumping quite a bit backwards and/or right horizontally in order to get over that last ledge. Use the power bomb to break the rocks, go thru to the Life Grove. Use the power bomb again to break the walls (if you don't have another power bomb, simply wait for one of the Seedling enemies to show up - destroying it should give you one). Use the ball bomb on the small circle in the pool to raise the spire, use the spinner, then jump up via a nearby tree to get the Artifact of Chozo. Jump on top of the rock and do a rodeo jump to get back out without having to fight the ghosts. Back in the Great Tree Hall, use the X-Ray Visor to locate an invisible platform to get to the Great Tree Chamber and get another missile expansion. Head back out.
Head back to the Chozo Ruins South Transport. In Chozo, take the next door to the left, which goes to Tallon Overworld East Transport, after the ball tunnel behind the save station in the Reflecting Pool. Enter the Tallon Frigate Crash Site, and from there head to the Magmoor Caverns East Transport.
 Plasma Beam (Geothermal core): At Magmoor, take the Twin Fires Tunnel, do a scan jump to get across. Use the spider track to scan dash across. You have to pull down, bending the dash backwards, almost immediately after releasing the scan.
 You can also try and make the rodeo jump, though it sounds and looks easier than it actually is - it's one of the hardest jumps in the game. Only recommended for extreme speed runs. You use an L-jump first, and while in the air, turn right towards the outcropping rock. Try to get as much distance as possible while facing and being right next to the rock, then do a rodeo (L+R) jump to finish and land. Some like to jump from the second outcropping (as shown in the first jump), but I prefer going even farther to the right to the third outcropping (shown in the next two jumps), it feels like it's a smaller distance from there, however, you really need to bend your jump to the right. Unfortunately, this is one of the hardest jumps to practice because of the lack of any close save stations or enemies to regen health. There is another way to get out the other side using the bomb jumps, but again not much room for error since the lava kills you pretty quick. This is where emulators like Dolphin will come in handy, where you can practice this over and over right away using save points.
 Proceed to the Geothermal Core, grab the plasma beam there.
 Getting the Plasma Beam without the Spider Ball or Grapple Beam is pretty easy. The little outcropping on the box after the jump from the rock is easy to slide off of, and then jumping on the small area of the stalagmite is a bit tricky. After getting up to the third raised platform, you can jump up on top by backing up and ghetto jumping out. Then to get to the door, ghetto jumping on some spider ball structures on the wall to get high enough to jump over to the platform. The first of the wall structures, again, ghetto jump on it from straight on, doing it from either side is tough because you slide off easy from your momentum.
 There is a faster way with a jump, but it's pretty tough. Basically it's doing an L-jump, then almost immediately after hitting R and turning to the right. Almost immediately after that, doing a rodeo (L+R) jump forward towards the platform. There is actually an invisible platform that extends out, which you'll see come out when you're above it.
Head farther on to Magmoor Worskstation. Hit the blue/green/purple colored alcoves on the left with the wave beam to open the floor to start the puzzle to grab the energy tank. The purple door goes to the Phendrana Drifts South Transport, which is where we want to go (save station behind transport). The other door leads to Phazon mines, which we'll take later.
 Phendrana Drifts South - Jump on a nearby pole then rodeo jump over to the access the ball tunnel above the spider track. Go to the Frozen Pike, take purple door to the right and below. This leads to the Research Core. DO NOT pick up the Thermal Visor here, pick it up on the way back (otherwise, the lights will go out in a bunch of areas and it's annoying). We are going in reverse, so things will get closed off and harder with the visor picked up. Can get a missile expansion and energy tank in Research Lab Aether. (If you're not grabbing the Spiderball, this is a good area to kill enemies and blast crates to make sure you have at least two power bombs for Phazon Mines access later on).
 In the Control Tower, grab the Artifact of Elder early. When doing the double jump, aim quite a bit lower than where you want the missile to go (at the three orange vertical cylinders) when jumping since the reticle will raise up naturally on the second jump (don't hold L on the second jump). If you weren't able to get the Artifact of Wild via the Sun Tower bomb jump, you'll have to get the Super Missile. If don't need it however, you can just turn around and go back the way you came, to the Frozen Pike (go here), and not even deal with enemies at the Control Tower. Otherwise, continue on to the Observatory, fighting a few waves of pirates before you go
 Super Missle (Observatory): If you didn't grab the Thermal Visor, you can just do the bomb slots and spinners to get the projector going and head back the way you came, back to Frozen Pike. If you did grab the Thermal Visor for some reason, or you want to save time, you can just do a few jumps to grab the Super Missile.
 Again if you grabbed the Thermal Visor (or are looking to save time), you'll have to do the Observatory scan dash and a rodeo jump to get back up and out, heading back to Frozen Pike.
 Back at the Frozen Pike, take the topmost of two vertical doors to the right, to the Frost Cave. When there, use missiles to take the stalactites down, and go to the furthest door across (one to the right is a save station) to get to Phendrana's Edge. You can also scan dash across.
 Grab Artifact of Spirit in the Storage Cave at top of Phendrana's Edge, without the use of the Grapple Beam. The hidden door is below power bomb expansion room, use a power bomb to destroy rock in front of it. Go up and rodeo jump across to get the power bomb expansion.
 A slightly faster route in Phendrana's Edge is to use the tree next to the door, although it takes some practice to figure out where to ghetto jump and land.
If not planning on getting the Spider Ball (or the Ice Spreader or Grapple Beam), head back to Magmoor Caverns South Transport. Also, on the way there, try and kill enemies or shoot crates until you pick up another power bomb; you'll need at least two in order to proceed into Phazon Mines. Jump to here in the guide.
 Spider Ball (Quarantine Cave): Go back to Magmoor Caverns South Transport and past it, go on to Quarantine Cave to fight Thardus and get the Spider Ball. Use either fast missiles or the charged plasma beam, seems to be the same speed using either. This is only optional if you were able to make one of the Sun Tower jumps earlier to grab the Artifact of Wild AND you'll be able to do the bomb space jump in Elevator Access A in Phazon Mines later, which is quite difficult to do (as well as some other areas that will require scan jumps and the like). The fight and trip will add about an extra 7 or 8 minutes, so it's only worth skipping if you'll be able to conquer later areas without wasting that much time or more. Also, don't use any power bombs on Thardus (there is a way to use one when he's doing his last lightning strike to finish him off) as you'll need at least two if you are not going for the Ice Spreader and Grapple Beam.
You now have a choice. If you want to pick up the Ice Spreader (and it's not at all necessary), as well as the Grapple Beam (again, not necessary, though makes a few areas much easier) use this route. If you don't, use this one instead. However, if you go this route, make sure you have two power bombs, or you'll have to kill enemies and hope they drop them for you.
Take the North Quarantine Tunnel out to the Ruined Courtyard, take the lower door to right (one straight across is the save station - and right below that is a morph ball hole where you can grab another energy tank) towards Ice Ruins West (pick up power bomb expansion on way thru), to Phendrana Shorelines then to the Magmoor Caverns West Transport.
 At Magmoor, if you didn't pick up the Artifact of Strength earlier, go to the Monitor Station and pick up it up now as well as an extra power bomb in the Warrior Shrine, also the Ice Spreader below it in the Shore Tunnel if you like (optional, not necessary, but still helpful on Metroid Prime's first form later). When using the scan dash, bend it backwards by pulling down on the thumb stick on the second jump.
 Take nearest transport at Tallon Overworld West Transport. Could head to the Chozo Ruins West Transport to get to Elder Chamber, but it's faster and less enemies (especially ghosts) to head to the Frigate Crash Site, do the climb, and use the Chozo Ruins East Transport.
  You can also climb the Frigate Crash Site from the other side of the water. You need to immediately bend the dash forward hard, then backwards after clearing the tree to make this jump. (I find it easier to actually do the initial jump holding forward somewhat instead of completely to the left.) Go to the Hall of the Elders, use the white bomb slot to get the energy tank if you want, and the plasma bomb slot to get Artifact of World.
 From the Reflecting Pool take Tallon Overworld South Transport, and from the Tallon Overworld Great Tree Hall take the Phazon Mines East Transport to the Main Quarry. You'll have to do a rather tough double bomb jump in the Great Tree Hall to get through. You need to jump over the top bar in the spot far to the right, and it's difficult because the ground is not level, so you have to try to keep the ball in the same spot after laying the first bomb.
 Main Quarry - need to scan jump to get to the white door above. You can either kill all the enemies and use the spider ball track in the distance to lock onto, or use the enemies and lock on to them. Obviously the latter is a bit harder as you only get a few shots before they move around. On the last jump, you can see you also have the option to go a little farther away in order to get a bit more height which may help.
 You can also do a harder jump in the beginning, but it's faster, no enemies to deal with, and requires an easier scan dash jump. Aim at the first brown beam from the left on that column when ghetto jumping, the hard part is jumping off that ledge at the last possible moment so the overhanging rock on the left doesn't impede your upward momentum. After the first L-jump, let go of the Left Trigger, and turn to the left, then L-jump again, trying to go left as much as possible. You're trying to land on the leftmost part of that small bridge piece. If you go to far right, you won't have the height and will just fall. You also don't want to go left too early, else you'll bump into the rock next to it and that will stop you as well from landing correctly
 This way is even faster yet, same as the last but using one of the enemies near you to scan jump across, bending it backwards as well as space jumping backwards.
After going through Waste Disposal, in Ore Processing grab the Grappling Hook in the room straight across at the top via a rodeo jump. Unless you're doing an extreme speed run (and if you are, you wouldn't be taking this route actually), you should grab it; it only takes a few seconds and will make a few areas later on (like the Metroid Quarantines, Fungal Halls) easier. Make sure to take the white door on the left of where you came in one level down, not bottom one, heading down the elevator to Elite Control. (You can take the bottom floor if you like, it just does things in a different order - you would end up going through Research Access first to Elite Reasearch to grab the Artifact of Warrior, then heading back here, then climbing up to the door one level from the top, and continuing here. Doing it like this will require climbing in Ore Processing twice, however, so it isn't as efficient.)
Head back to Magmoor Caverns South Transport At Magmoor, take the door to the right to the Workstation Tunnel and lay a power bomb to get past the blockage to get access to the Phazon Mines West Transport. You're going to need another power bomb upon entering Phazon Mines, so if you don't have another on you, you *may* get lucky and get one right away from one of the spiney enemies in the Workstation Tunnel. If not, you'll need to go to Transport Tunnel C and come back to load the enemies, and try until you get one to drop. From there take middle white door in Phazon Processing Center, using the ball tunnel and heading to Elite Control.
 Keep going until Elite Control, you'll face the Elite Pirate and can skip him by jumping on top of him to jump to the column to the right and then to scaffold above. Alternatively you can jump on the container to the back left, then to the column ahead, then back left to the scaffold. At the top you can then open the force field manually and leave. This is really only used for speed runs, as you can down him in less than ten seconds with fast missiles anyhow. In the Ventilation Shaft, power bomb the small rectangular grate on the floor on the left, go under to turn on the vents and grab the energy tank. Keep going and head to Omega Research - you can just skip the enemies and go right for the white door in the floor to the lower left.
 Follow the shaft and kill the Elite Pirate with fast missiles. Get the Power Bomb ("officially") in the Central Dynamo and keep proceeding through.
 Metroid Quaratine A will give you a bit of trouble if you don't have the Spider Ball. One trick is to keep at least one metroid alive so you can freeze it in the right spot so you can use it to scan dash across. You only get to freeze one five times before it will eventually die.
 You can also just kill all the metroids, and scan jump across using the missle expansion, although you'll have to R-jump to the right at the end of the jump in order to make it to the platform.
 You can also try R-jumping directly from the beam to the platform, however it's quite difficult if you haven't mastered the R-jump yet.
NOTE: A Power Bomb is needed a few rooms from here, in Fungal Hall A, so make sure at least one is left in inventory when leaving the room. I find it best to lure the metroids to the wall that needs to be power bombed anyways so to conserve them. Otherwise, killing enemies in hopes of them dropping a power bomb will be the only way to progress.
 On the way through the Fungal Halls, some jumps need to be made with scan dash, rodeo or ghetto jumps to get there if you didn't pick up the Spider Ball and/or Grappling Hook. In Metroid Quarantine B, you can jump up and rodeo jump across, kill the enemies first if you need to.
 You can use the enemies to scan dash across the chasm in Metroid Quarantine B, however the timing is tricky, and sometimes the RNG of where the enemies are and how much you're getting hit will make this a bit difficult.
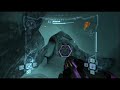
 Phazon Suit (Elite Quarters): The Omega Pirate can be beaten in one round (without having to break his phazon plates all over again) by doing the following: Break the plates with fast missiles, then when done, stand next to a phazon pool. Two pirates will come out, and you can try to jump around a bit and ignore them. However, they usually throw off or block your shots and ruin things - all it takes is to miss one shot and you won't be able to defeat the Omega Pirate in one round. It's easier to kill them, but you have to be quick about it so your plasma cannon is charged and ready to fire at the Omega Pirate before he appears. Have your plasma beam equipped along with the X-ray visor. The Omega Pirate will show up in one of the two pools you're not standing next to, so keep an eye on both. Keep jumping up to the left and right next to the pool to keep from getting hit by the two small pirates. When he appears (after the second laugh), scan lock and fire the charged shot. Immediately unlock the scan, look slightly away from the Omega Pirate, then hold down fire to charge another shot. As soon as it's charged, lock and fire again. The reason you don't want to keep the lock is because if you do, when you hold down the fire button for the charge, the first regular shot would hit him, and we don't want that as it will lessen the damage done and allow him to regen his plates early. He will disappear, but will appear at the other pool you're not standing next to (he will never appear at the one you're next to). Repeat the procedure. He'll then appear in the other pool again, etc. As long as you hit him with both charged shots fast enough, he will die before regenerating the plates. It also helps to get the lock on him when in the air; otherwise you may accidentally lock on one of the smaller pirates and throw everything off. Moving towards him helps as well, just keep an eye on where you are and move back to the phazon pool you're "guarding" in between teleports.
After defeating the Omega Pirate, head backwards to the Phazon Mining Tunnel to get the Artifact of Newborn. Now go back towards Elite Control again, as we need to go back through Phazon Processing Center towards Ore Processing to get the second to last artifact, and this route is faster. Use the middle white door in Phazon Processing Center to get to the small ball tunnel that leads to Elite Control
NOTE: Make sure when going through the Fungal Halls and back to save one Power Bomb and not use them all (which can happen when frustrated by a mob of Metroids that are blocking Samus from moving). One will be needed in Elite Research to get the Artifact of Warrior.
 In Elite Control, you can skip the Elite Pirate for a second time by jumping over the trigger area, tho it's a bit tough to do - again, only needed for extreme speed runs.
If you have the Spider Ball, Elevator Access A is no problem. If you didn't grab it, you can make it, but beware, it's one of the hardest tricks in the game to pull off. You'll need to do a trick called the Bomb Space Jump (BSJ). Essentially, it involves doing the Double Bomb Jump (DBJ) but doing it while having something obstruct the camera, i.e., getting a piece of the scenery in between Samus's morph ball and the camera at the apex of the jump, then unmorphing. Doing so will cause an instant unmorph (instead of the usual unmorphing from a ball animation occurring) which will trick the game into thinking she is still on the ground, and will enable you to do a space jump right after unmorphing. Therefore this trick gives you the most height of any other in the game, it's basically the height of a space jump on top of the height of a DBJ. You need to hit the jump button immediately after unmorphing.
 So in this instance, the best place to do it is to stand right in a bit of a crook between the left edge of the doorway and a small rock. Move until completely seated between the two. Then turn without moving (using the right trigger) to look at the left side of the square beam that's to the right of the spider ball track. Once at the correct angle morph into a ball, then do the DBJ. Right as the second bomb goes off (possibly *slightly* before), start pushing forward on the left stick, so the explosion of the third bomb sends you up and away from under the doorway, and towards where the first landing spot is (second small truss piece when looking up at the square railing). DO NOT HOLD L-TRIGGER at this point (strafe lock). At the apex of the DBJ unmorph and hit jump IMMEDIATELY after the unmorph (almost simultaneous, done one right after the other). At this point you can hold L-trigger for strafe lock, and while keeping the left stick held forward this whole time, hold it to the right slightly as well to hit the landing area. If done correctly, there will be no unmorph animation and allow a double jump after unmorphing. If there is an unmorph animation, it means you might have moved either too far or not enough in the air to keep the camera at the correct spot. Not being able to jump after the instant unmorph means you didn't hit jump quick enough after. If you can't even unmorph, you didn't hold forward on the left stick enough (or possibly too much). Even after it's done correctly, you may find you're not getting the height to make it. This is probably because you did the unmorph a little too quickly (which was my issue). Try unmorphing later and later until you finally get the height, although if you wait too long the window for the instant unmorph will close. Personally I try to imagine where the ball will be at it's apex from the bomb jump (since you can't see it through the wall), and unmorph-jump at that point.
That first jump is the worst part by far, the rest is easy after that. Jump on the truss piece across from you. Then look back at the spider track. You want to aim to "wedge" yourself between the wall and the left side of the track. Hold the thumb stick forward (or towards right in between the wall and left side of the spider track) when landing. Letting go of the stick will allow you to fall a bit - as soon as you start to fall, immediately push the stick forward and hold it there so you catch yourself on the next ledge or whatever you want to call it. Do another space jump up, wedging yourself again and holding forward, letting go of the stick, falling, then pushing forward, jumping, wedging, etc. until you get to the top.
 This time in Ore Processing, jump down and take the white door on the bottom floor below you to get to Elite Research, it leads to Research Access. Again, if you have the Spider Ball, this area is no problem; otherwise it's a bit trickier without it, though not as tough as Elevator Access A. First ghetto jump up onto the ledge above the doorway. Start moving left until you actually move upwards a bit. Then ghetto jump outwards so you clear the spinner then right back in, and you should land right below a rock protruding above you that you need to jump on top of, though it has a very small area to land on. From there, again, across to another spinning ledge, and then jump quickly out then up to the left to land on the railing attached to the wall. Make sure to go quite a bit left as you'll slide off if you don't go far enough over, the smaller truss piece won't hold you even though it looks like it will.
 When you get to Elite Research, since you're going in backwards, you have to bomb jump while holding forward on the thumb stick then boost a bunch of times to get past an invisible barrier at the top. Use the spinner to aim the cannon at the back wall to blow it, jump to the bottom, kill the enemies, power bomb the Elite Pirate container then kill him with fast missiles, picking up the Artifact of Warrior when done. Scan a few terminals to activate the access lifts to go back up and leave the same way you came in.
ONLY go via the white door in the floor in Elite Research if you are planning on getting the Flamethrower (which isn't needed and isn't very useful) AND you disabled the force-field in Main Quarry on the way in. If going this route, in the Mine Security Station, do not kill the purple pirates; kill the invisible ones but if you kill the purple ones, the doors will never unlock, so run past them, kill the invisible ones, wait for the cutscene of nothing dropping out of the ceiling (because you killed them), then kill the rest and the door will unlock.
 Head to the Main Quarry to get to the Tallon Overworld South Transport. If not getting the Flamethower (not needed), go towards Ore Processing, and if you don't have the spider ball and or grappling hook, get back up to the top with a series of jumps. (Even if you do have them, this is quite a bit faster than manipulating the column pieces.) The first jump is next to the leftmost of the flashing vertical blue lights. From there hold L-trigger and ghetto jump left to the second level. Jump back onto the middle pillar directly on it (release L-lock when hitting the middle pillar, it helps to keep falling off), then jump back again onto the third level. If you have the grappling hook, you can then look up and jump then grapple the grappling point above to get you to the top level and out. If you didn't, you can still get out by destroying the bendezium blockage, jumping on top of the bomb slot, then jumping on a ledge sticking out of the middle pillar and then up onto the top level. Alternatively you can jump on that ledge by standing on the railing without jumping on the bomb slot, though it's a bit harder.
From the Main Quarry take the Tallon Overworld South Transport. Once in Tallon, take the Chozo Ruins South Transport and then in Chozo head for the Tallon Overworld East Transport. Make your way to your ship at the Landing Site. Skip to the next paragraph if you already picked up the Artifact of Wild. Otherwise head to the Magmoor Caverns East Transport, take it to Magmoor, then from there head to the Chozo Ruins North Transport. From there head to the Sunchamber to fight three ghosts and collect the Artfifact of Wild. Leave via the other door, and make your way to the Tallon Overworld North Transport. From there, head to your ship at the Landing Site.
From the Main Quarry take the Tallon Overworld South Transport. Once in Tallon, take the Great Tree Hall upwards to the Chozo Ruins South Transport. In Chozo head to Hall of Elders to get the Artifact of World. Use the plasma slot to get artifact, and use ice slot for another energy tank if you like. Yon't have to fight the ghosts. Head back to the Reflecting Pool again and take the Tallon Overworld East Transport. From there, head to your ship at the Landing Site.
 Head for the Impact Crater, which is the door straight across from your ship. You can scan dash to it, though it takes some practice.
 On the way you'll pick up the last artifact, the Artifact of Truth. For Meta Ridley, hit him with charged plasma shots. When he lands, boost ball into him to take away a huge chunk of health. From there, stay at closer range, use charged beam shots at his mouth, then fast missiles at his chest.
 For Metroid Prime, after the shell is gone, stepping in and out of the phazon pools quickly 6 or 7 times while holding the fire button down, then standing in the pool completely to drain it will do the most damage.
And that's it, the game is done.
 A bonus area is the Crossway in Chozo. This is a good spot to practice R-jumping if one is so inclined. You know you've done a well-executed R-jump if you can make it completely across the gap. L-jump forward (hold L trigger, release right after jumping), and slightly in opposite direction you're going to turn. In this case I was turning to the right, so I jumped slightly left. This slight angle actually gives a tiny bit more speed. As soon as you jump, hold the stick right or left HARD to start turning to the right/left (right in this case). When turned close to 90 degrees in the air (you're basically sideways at this point), hold left stick mostly UP and slightly towards where you want to land (it seems unintuitive, but up is actually towards where you're jumping to looking sideways, not towards where you're facing like you'd think), hit L and R trigger (Make sure to hit and hold R before L though), and hit A to space jump. Immediately release L trigger. Keep holding R trigger and left stick towards target (should be mostly up). As shown in the video, if you don't have the Y axis inverted, it's slightly harder since you can't see where you're landing. I recommend practicing with the Y-axis inverted until you get the feel of it. The video makes it look deceptively easy; it actually takes quite a lot of practice to get the timing down correctly. The most important part is the take-off. You want to make sure you're jumping slightly left/right of target, getting a good L-jump, and IMMEDIATELY cranking the Left stick in the opposing direction to the right/left (respectively) so you're moving sideways as soon as possible. The more sideways you are, the faster and farther you'll go.


