Sarkade MAME Cabinet


This is a documentation of my first homebuilt arcade cabinet. In fact, it's my first homebuilt anything when it comes to woodworking aside from junior high classes. This is not meant as a complete walkthru of how to build one. This will maybe help others as far as what to expect and a few tips I found helpful. Basically, making your own is a simple two-step process.
Step 1: Planning
This is a pretty big step. I first made the decision to make a cabinet when I found out MAME wasn't just emulating Pac-Man and Centipede anymore -- it could do the entire Street Fighter series, Mortal Kombat series, and to my surprise -- the Killer Instinct series. The last two were especially surprising as they are not only emulated perfectly from the ROM, but from the original hard drive images as well. For those who are lost, MAME stands for Multiple Arcade Machine Emulator. It's a PC-based program (but it runs on different OS's and platforms as well -- Windows, Dos, Linux, Mac, Dreamcast, PS2, Xbox...) that uses the actual ROM image from the original arcade machine. It emulates the hardware through software programming. This is possible because computers have become so powerful. So every nuance of the original game -- every error, every easter egg, every single pixel is displayed as it was originally -- because it's using the instructions from the image of the original machine ROM. As of right now, the amount machines it can emulate is astounding -- it can now run close to 5000 different arcade machine ROMs. Do a search on the web and you'll find tons of stuff on MAME and ROMs and where you can download them for free. MAME can be downloaded from the source at mamedev.org. ROMS for games can be downloaded at places like Rom Nation or Rom-World. Places like these are fine for searching out some of your favorite games, but sooner or later you will want every game you can get your hands on. Searching torrent sites such as The Pirate Bay will yield entire collections of roms as well as the large hard drive image CHD files required for some of the more advanced games.
After testing out how great these games ran on the PC with a USB joystick, I went to work on figuring out how to build my own cabinet. A prefab can be purchased on the web -- for around $4000. I can follow directions pretty well, so I searched the web. Finding the right cabinet plans wasn't too difficult. I mostly used the Ultimate Arcade Cabinet by Cybertech plans as a base for what I wanted. I was thinking about a cocktail cabinet at first, but decided on an upright. A cocktail cabinet wouldn't work too well for what I wanted, which was a 4-player cab -- great for games like Teenage Mutant Ninja Turtles, The Simpsons, and even Smash TV with the four joysticks. A prefab 4-player panel can be purchased on the web from www.slikstik.com -- for around $700 bucks (and that's without the cool stainless steel joysticks.) Again, I used this a standard for what I wanted and deviated from it somewhat to fit my needs.
A visit to the Happ Controls website -- www.happcontrols.com -- was the next step. These guys are the only ones to buy from for arcade controls -- because they sell actual arcade controls. The controls will be wired to work with a PC -- thanks to a visit to www.ultimarc.com So the gameplay experience will now be complete -- on the graphics and sound end by MAME and from the control end by Happ and Ultimarc.
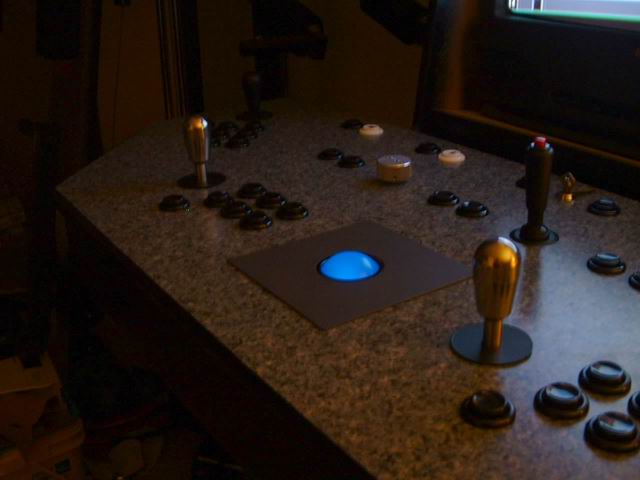
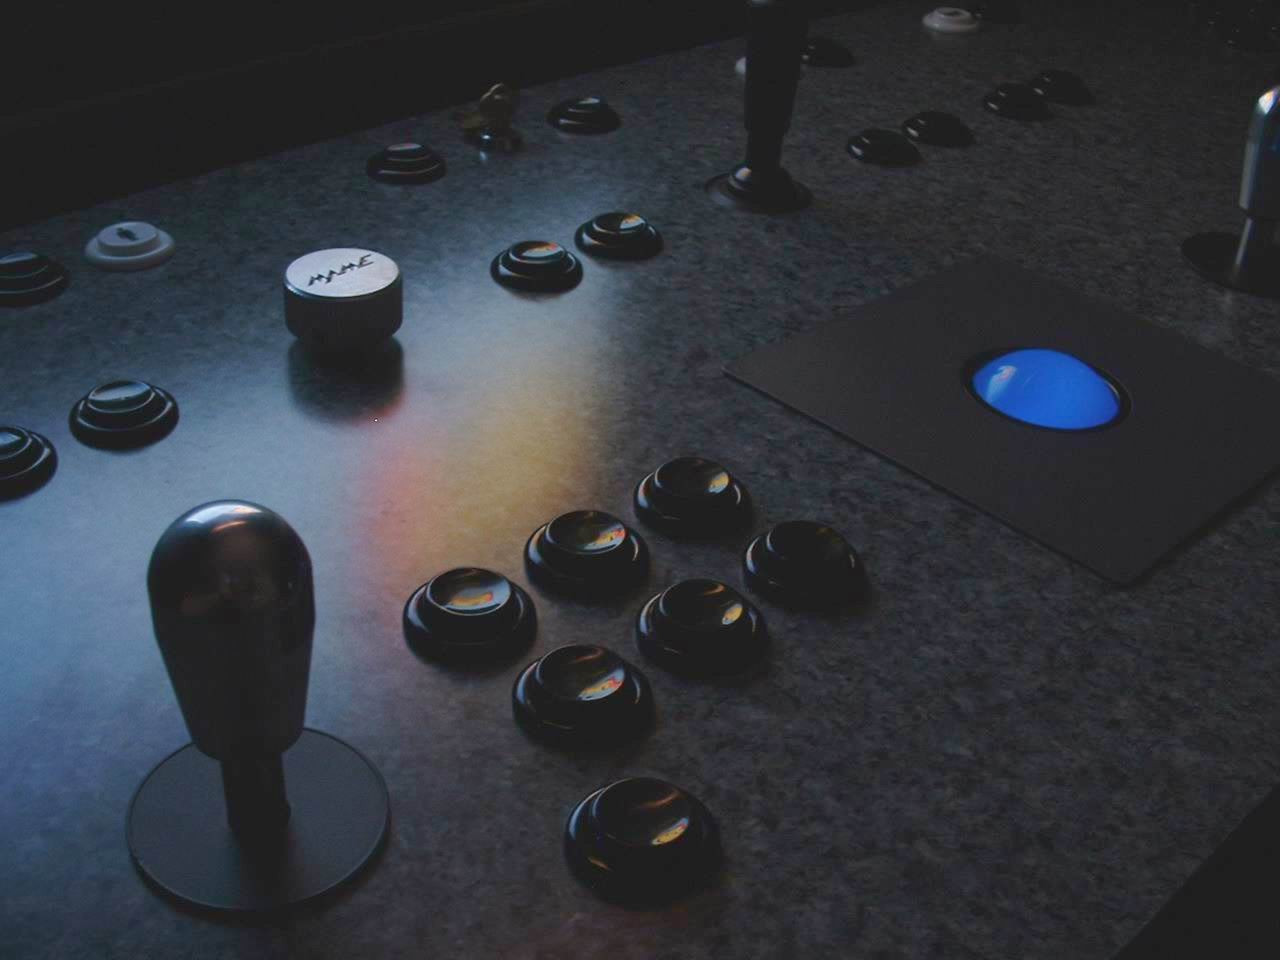
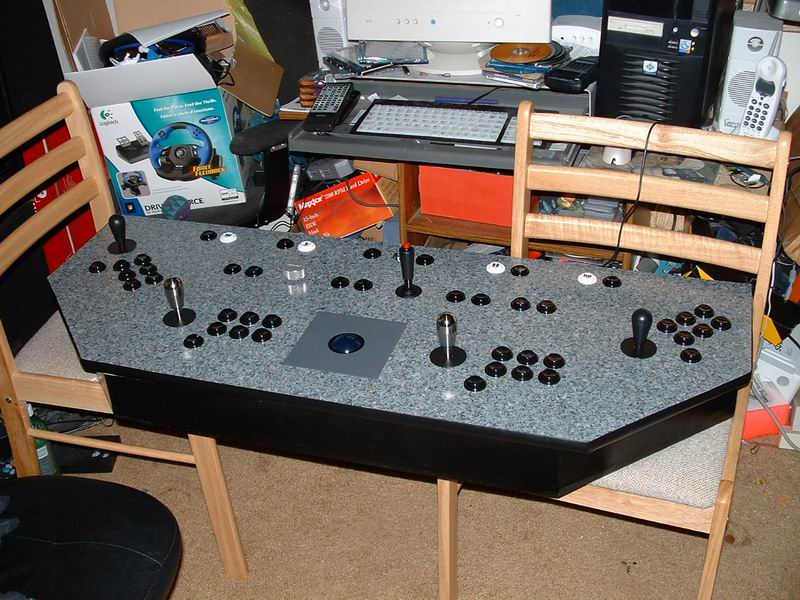
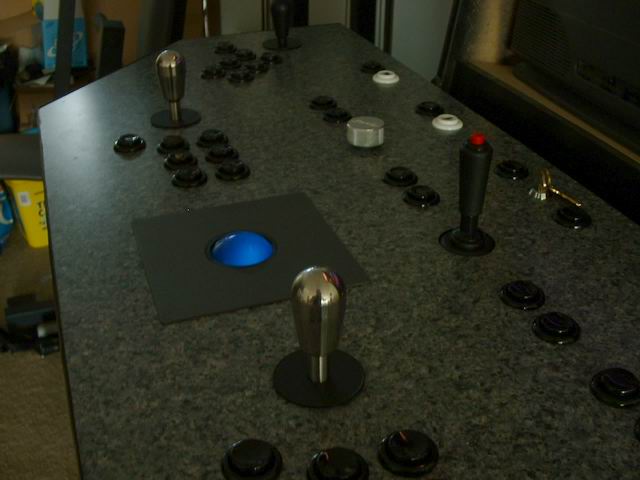
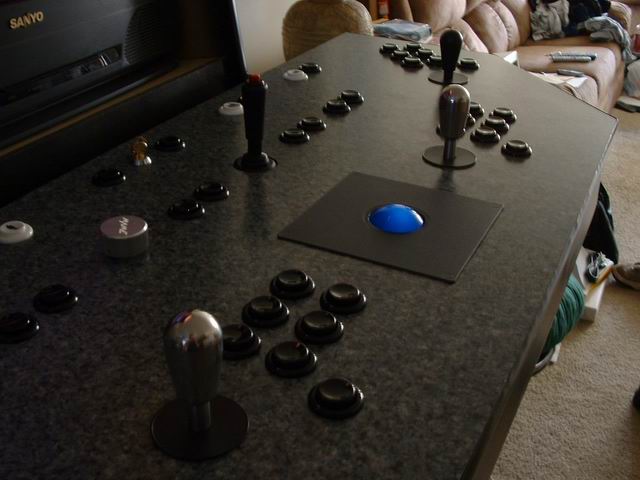
I chose to make a panel with four 8-way joysticks, one top-fire joystick, one spinner and one trackball. I needed the top-fire joystick (as well as the spinner) for a couple of my favorite childhood games -- Tron and Discs of Tron. So, for what I wanted to do, I would need to purchase two Ultimarc interfaces -- the OptiPac and the Ipac4. These are what the controls get wired to and what communicates to the PC (via USB or serial) in a similar manner to a keyboard (for the buttons and joysticks) and a mouse (for the spinner and trackball). I also picked up a trackball from the site and some buttons. The trackball is a great buy (much cheaper than a Happ trackball and works great) but the buttons are crappy compared to Happ's.
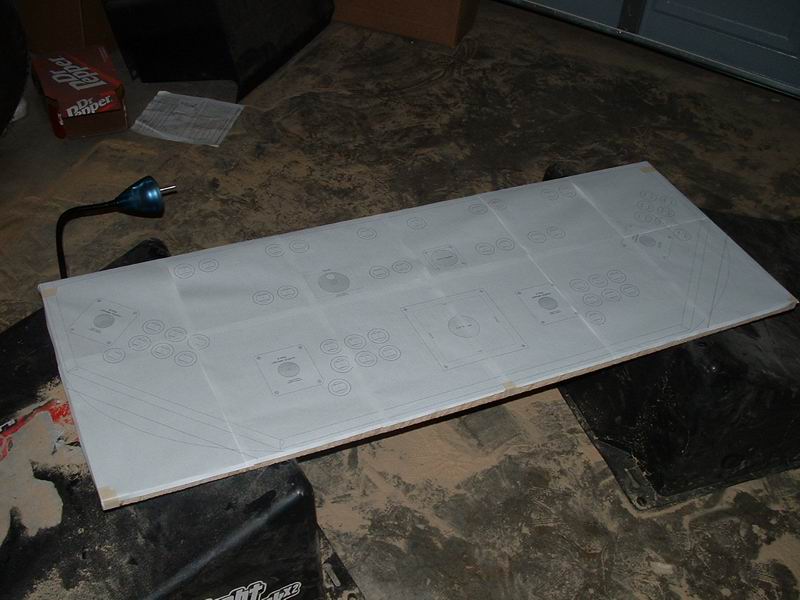
I designed the panel layout in Microsoft Visio. It's a nice program as it's easy to input dimensions of shapes and label them. In fact, the only controls I had to template out from scratch was the top-fire joystick and the trackball -- you can find button and joystick templates on the Build Your Own Arcade website. Another bonus is the fact that after it's designed it can be printed out actual size on multiple pages and taped together. This gives a better feel for the spacing of real thing, and can be used later as a template for the holes in the panel like I did.
Step 2: Building
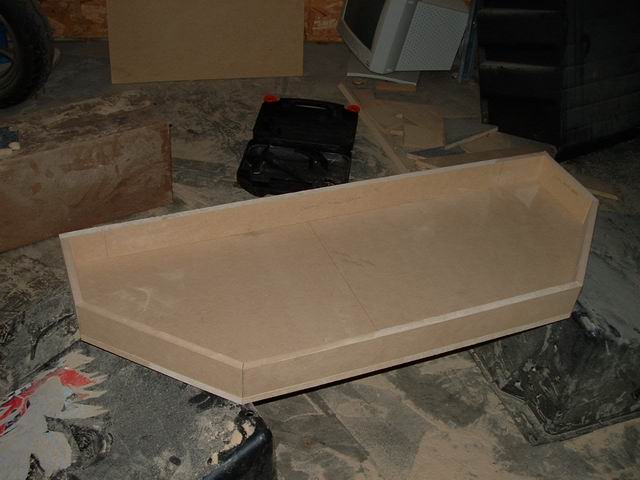
To build the cabinet, three 5/8" x 4' x 8' sheets of particle board are needed. To build the panel, I used a piece of countertop I found at Home Depot for 30 bucks. I was originally going to use some particle board and laminate it, but found this to be too much work. The countertop piece I found was a good neutral grayish marble color which looks good with black buttons. I built the box for the panel out of extra material from the cabinet particle board sheets. I built the panel first for two reasons. First, I would have something I could test out immediately on the PC to see how well it worked. Second, if I were to change my mind about the whole arcade cabinet idea, I would still have a cool control panel that could be used on my PC for MAME.

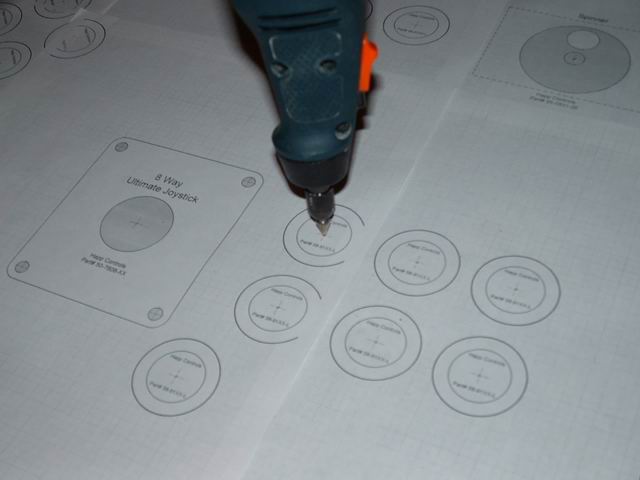
After I had the layout I wanted, I printed it out and taped the pages together. I ended up with a 2 x 6 grid of paper sheets. There were some slight aberrations in the printouts so that when taping them together, the edges didn't quite match up. Some slight rotation and re-adjustments of the masking tape and it was ok. After I had what I wanted, I taped it onto the slab of countertop I cut out to size with the circular saw.
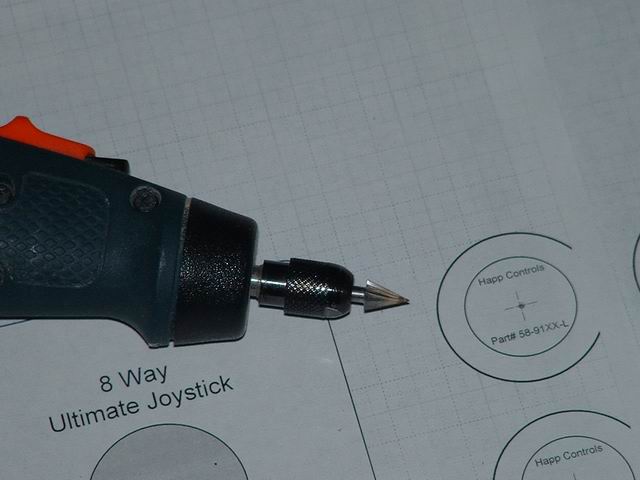
From here I used a Dremel with a pointed router bit (don't ask me what it's called, I don't remember the exact name -- look at the pic) and drilled through the paper and into the countertop laminate just enough to be used as a pilot hole for the hole saws later.
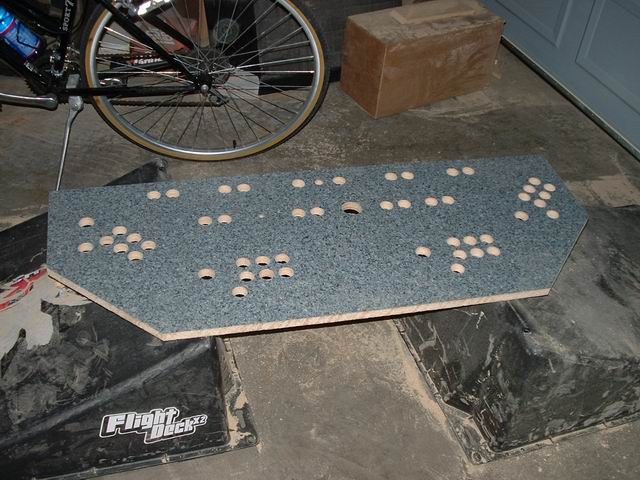
After that was done came the worst part of the whole (or hole) project -- using the hole saw to drill all those holes. First off, it takes a bit to get through the smooth laminate when drilling. Next, the holes have to be drilled half-way and then when the pilot drill comes out the bottom, it has to be flipped and drilled from that side to avoid the splintered hole syndrome. Also, I had a smaller horsepower drill so after three holes, the drill became quite hot. Lastly, my hands took quite some punishment as I had to drill while pressing down with most my body weight to get through the holes with enough bite so it wouldn't just sit and spin in the hole and burn. It was my bright idea to make a panel with over 50 holes in it, so I was the one who paid the price. After that, I had to drill two more holes in the corners of the square hole for the trackball so I could jigsaw the rest of it out. This hole does not have to be perfect as a metal panel sits on top of it. Neither do the edges of the rest of the holes, as the buttons have overlap on the top and the joysticks have the dust covers. From there the two 45 degree corners were cut, and the edges (aside from the back one) were routed with a slot cutter to accept the T-molding.

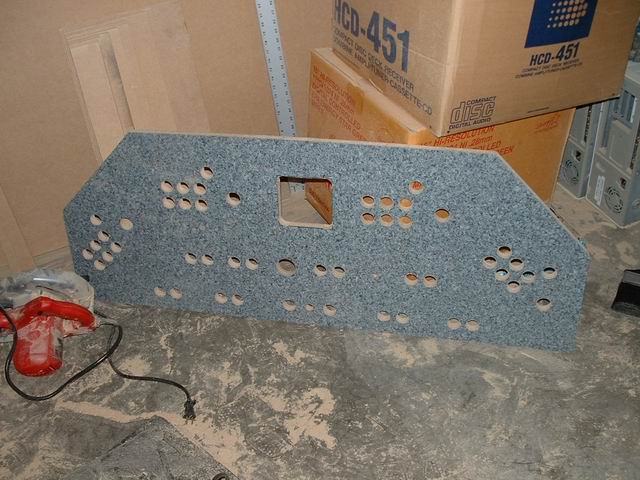
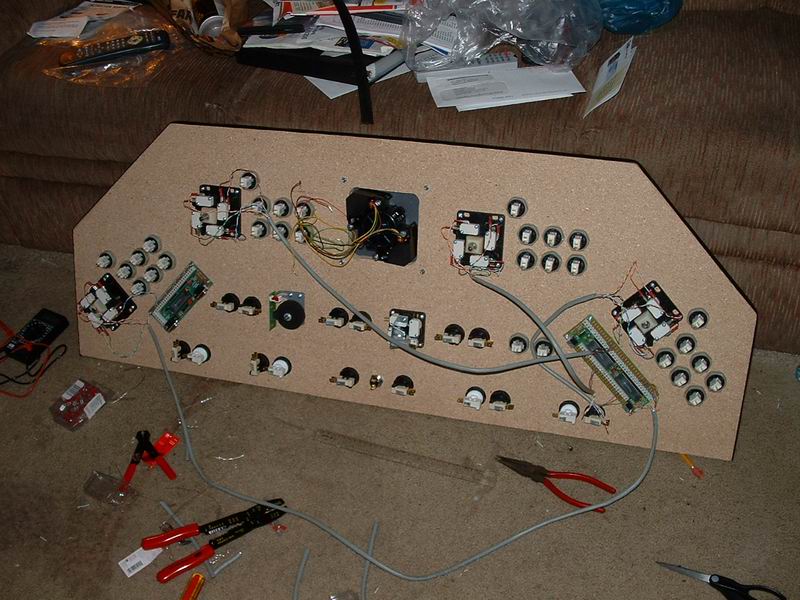
After that it was a much simpler matter of fitting all the controls into the respective holes. The key lock in the top middle of the panel isn't a lock for the panel (something like that would need to go toward the bottom actually) -- it's a switch lock. I wanted the ability to be able to have certain buttons work or not work with a keyed switch. That way I can have the credit buttons work when I'm playing or testing, and when I want others to have to pay for credits, I switch it off and take out the key. The switch also controls the one of the two buttons next to it which I use as shift function buttons. One is for other administrative tasks such as button set up and program switching, while the other is not switched for common users for functions such as escaping from the current game to select another from the main menu. The next thing to do then was to wire it all up -- pretty daunting considering the amount of controls and what I was looking to do. But all in all it was pretty straightforward according to the directions from Ultimarc. Instead of daisy chaining the ground wires from one control to the next, however, I used a different approach. I used scrap Cat-5 cable remnants from work and wired it with that. I used all stripped wires as ground. So all I had to do was use female electrical connect crimp ends on one end of the cable and connect them to the controls. On the other end of the cable, all the stripped wires were twisted together, and the colored wires went to the correct connections on the IPac. Eventually, all the grounds were connected to each other though twisting and soldering. Heat shrink tubing was then put over the soldered twists to prevent shorts. There are only two ground connections on the IPac, so after all grounds were eventually connected to each other a wire just needed to be connected from all the switch grounds to the IPac ground connection.

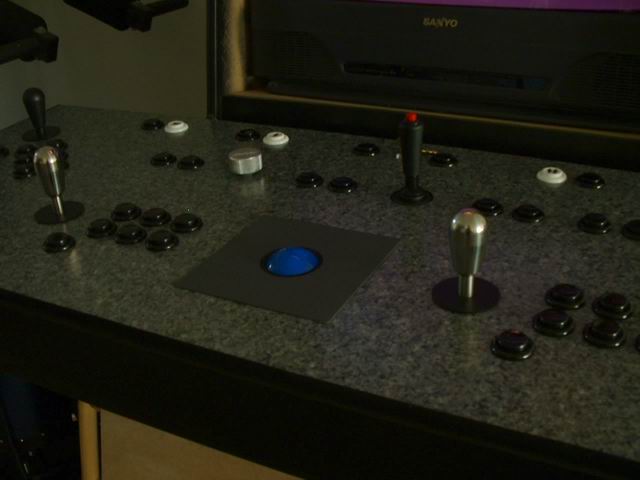
Now to test it on the PC. Windows XP found all the drivers automatically no problem. Windows 98 did the same, only you have to hit next a couple of times. The WinIPac program lets you configure what button should be equated to what on a keyboard. Usually the MAME standard is fine, but for 4 players, a little more is involved. The program is easy to use and worked with the IPac no problem. I played some Killer Instinct and was incredibly impressed -- no slowdown, no input delay. It was like I was back in the arcade. I should also say that I purchased two stainless steel joysticks from SlikStik. They are expensive, but after using them they are well worth the price. And they'll make your friends drool with envy. :)
With that done, I had good incentive to get to work building a cabinet for my new panel. I had an older PC I could use for the brains, a 25 inch TV I could use for the monitor, and had the panel done. I was thinking about using the Wells Gardner 9200 27" digital monitor. I still am, but it's a bit pricey at $480 -- and that's not including shipping. I don't think I will though as I just bought a couple PC USB light guns from Act Labs, and they use TV out -- the digital monitor uses VGA. Act Labs have now discontinued the VGA version of the light guns for some reason. And I must say, the picture is quite good, better than I expected TV out on a video card could do. Since no arcade video game uses above 640x480 resolution, there really isn't a problem here. The card I'm using is an old GeForce2 MMX 440.
After following directions and redoing the cabinet layout to accommodate my panel, I was ready to cut all the pieces out from the three sheets of particle board. I used 4' metal rule with clamps as a guide when making straight cuts with the circular saw. The inner angle of the cabinet sides (where the front of the monitor is) was cut with a jigsaw. My two skateboard ramps came in handy as low-ground sawhorses (see control panel holes pics). After the sides were cut out, I stacked them together and then clamped them. From there I power sanded the outside edges where there where small differences between the two, as well as the rounded corners.

After all the pieces were cut, I clamped and power sanded the thirteen pieces and four 2 x 4's so the widths were all even. This was 25 inches, but came out to a tad less after sanding all down to close to the shortest width. This way the entire cabinet is the same width everywhere. Next the edges of the sides were routed with the slot cutter to accept the T-molding, along with the front edge of the keyboard drawer.
Now came probably the longest part of the process -- the painting. I decided to use black metal flake spray paint with clear metal flake overcoat. I must have used over 20 cans. The hardest part were the sides -- it's hard to cover such a large area with a steady, equal amount of paint across the entire surface. Also make sure to use the same type of paint throughout. I used mostly the Candy Apple coat from Fleet Farm, but used a different brand of the same color (I thought) from Walmart. It was horrible -- the Walmart metal flake was almost pure grey from having so much flake in it. I didn't like the way it looked -- much less it didn't match the rest of the painted parts. So I went to another Fleet Farm out of town and painted over it, no harm done. It looks damn cool, but honestly, unless the cabinet is under direct light (and what arcade has that unless it's closing time) do you actually notice the metal flake. But it's a nice touch...
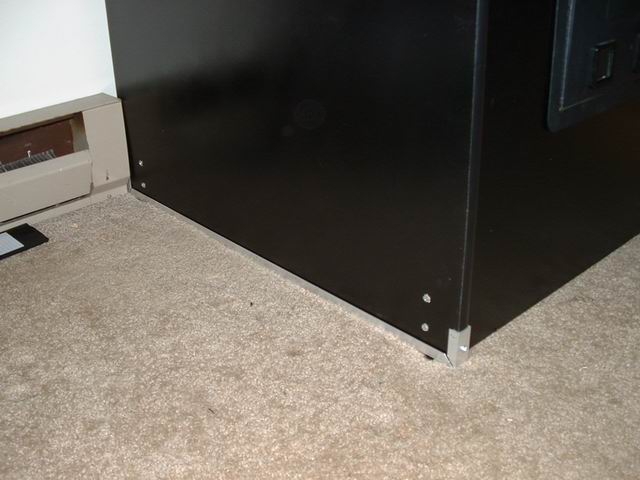
After the paint was dry it came time to assemble it. I thought this part would take the longest, but it really wasn't too bad. I took my time though, as I wanted to make sure I did everything right. I didn't like the way particle board completely decimates when corners or sides take a hit, so I decided to reinforce the bottom with aluminum channels. I sandwiched strips of this cheap ribbed stair mat material I picked up at Fleet Farm for a buck or so -- it filled the gap between the 3/4" channel and the 5/8" wood perfectly.
The drawer and drawer door hinge took a little bit of planning out, but it worked out ok. I couldn't find 25" piano hinge, so I used 2 12" hinges instead and it worked just as well. Measuring where to put the drawer slides was a little tedious. Also deciding on the right type of drawer lock to use -- I deviated from the plan so I had to improvise.
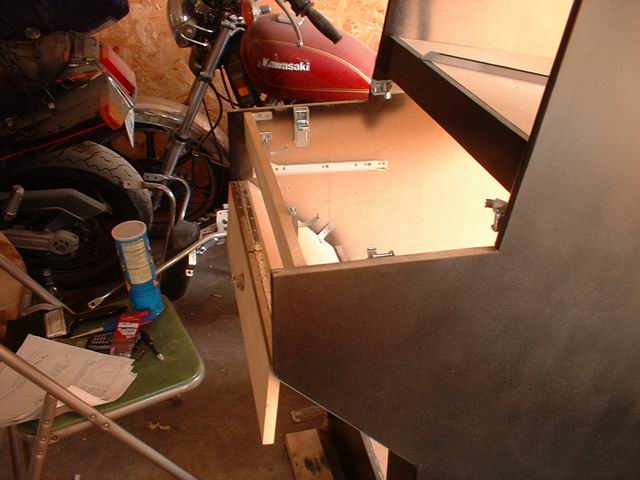
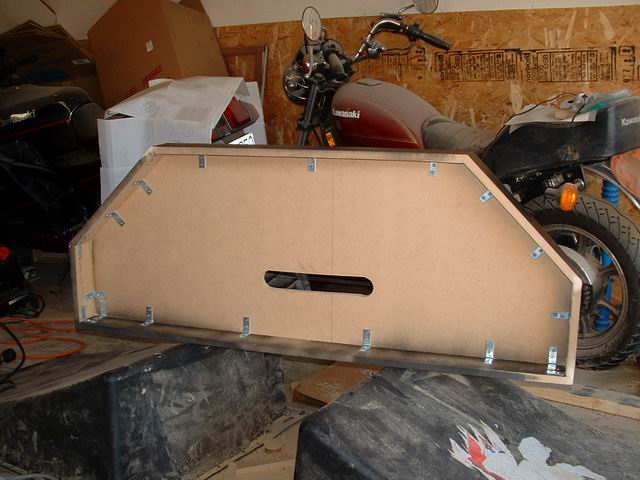
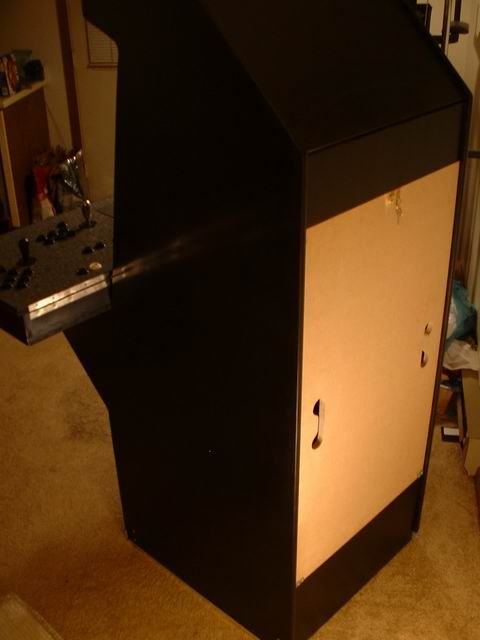
In the above pic notice the six hasps. I had to figure out a way to clamp the control panel onto the cabinet in a sturdy way but could also be disassembled without too much fuss. Why? Because the damn thing won't fit through a doorway otherwise. So I made some extra holes in the back of the panel box as well as made the bottom hole as big as the opening above the keyboard to accommodate the other ends of the hasps to hold it down.
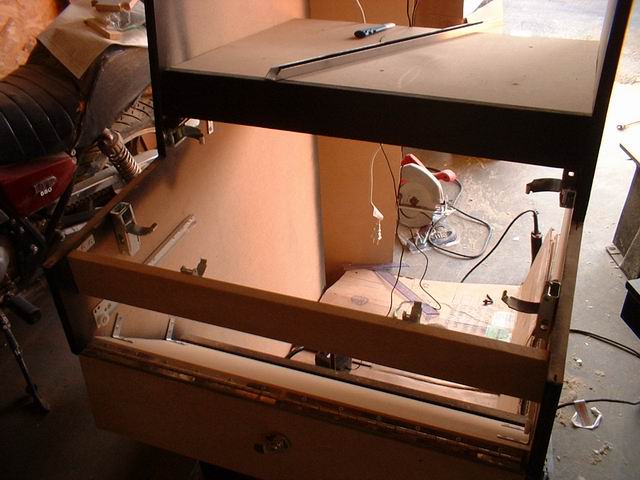
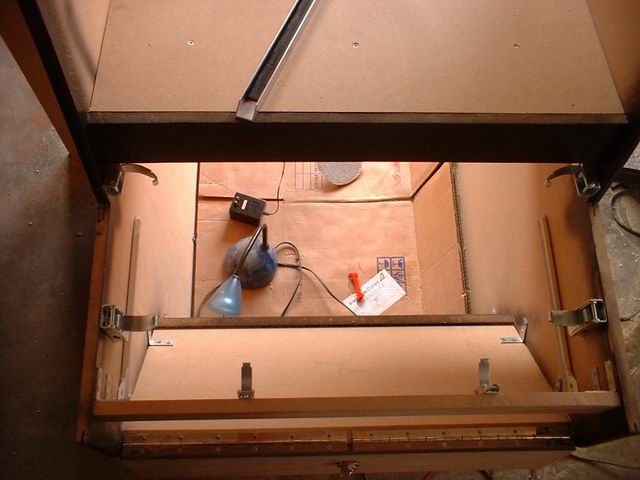
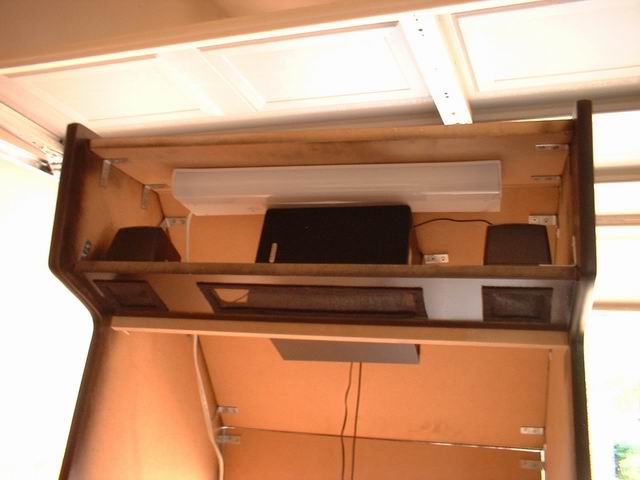
Another area of improvisation was the speakers. I bought a Soundblaster speaker and subwoofer set from Walmart for 20 bucks. The sound is great, as it has a lot of bass. I don't think you'll find a better quality system for even three times the price elsewhere. I cut holes in the speaker panel, then used black window screening and hot glued it to the holes from the inside. I used more of the L brackets to mount the speakers in the cabinet. The sub was to be mounted to the ceiling of the cabinet, just behind the flourescent light fixture. After measuring from the monitor shelf to the bottom of the sub, I realised I had just enough room for the TV to fit and bolted it down. I used one of my MP3 players to test it out, and the sound was amazing. The sub being mounted directly to the wood cabinet made the bass sound even better.
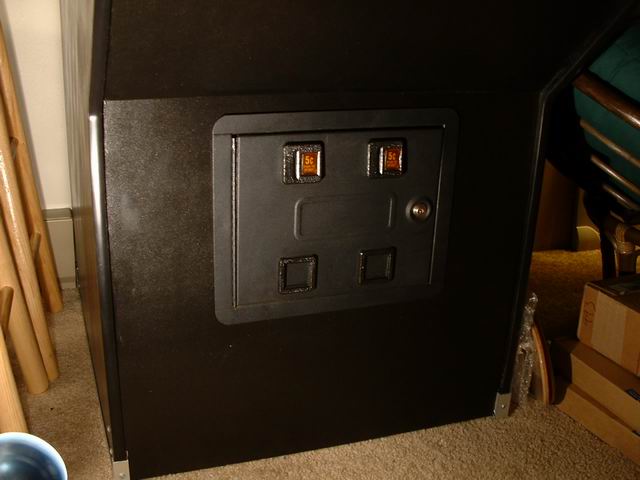
The coin door is one I got off of ebay for 20 bucks. I ordered two 5-cent coin acceptors to replace the normal quarter ones. I got the idea to put in the coin door when a few friends were over playing Gauntlet on the MAMEoX emulator for the Xbox. They decided it was fun, but the experience was tainted by the fact that one could continue forever by hitting a button. I figured by making it a nickel, it wasn't a huge amount to hurt anyone, but enough so that you would at least think when playing a game since it was costing you something. And later when there was enough coins, I'd use the earnings to buy a pizza for everyone or something like that.
Since I didn't need as much material from the particle boards for a control panel, I planned out a piece to be used as a back door. I used two more of the L-brackets (I'm officially McGuyver with them now) to use as stops so the door fits just flush with the sides and can't move inward any farther. On the bottom panel I used a couple of flattened brackets on the inside to accomplish the same thing. Two more brackets on the bottom but flush with the outside lets the door slide down and fit nicely. It also stops the door from being pulled out at the bottom. The top of the door has a drawer lock installed so the catch is on the inside and is stopped by the bottom of the top cabinet back.
Sliding the TV monitor into place is a simple matter. I think there is about 1/8" or less clearance from the TV to the top bezel, so I cut it pretty close. The TV is a 25", but there is enough room to accomodate a 27" Wells-Gardner 9200 if I ever decide to upgrade. Of course, you need a video card that does TV-out to connect it to the video input. The TV I'm using has a switch in the back which lets you turn off the TV speakers. Which is nice, since I don't have to worry about any signal hum coming from the TV.
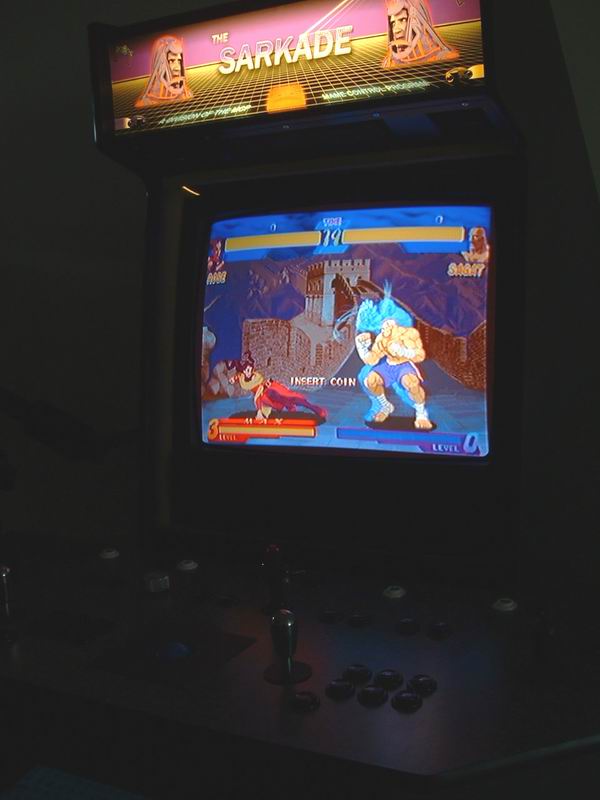
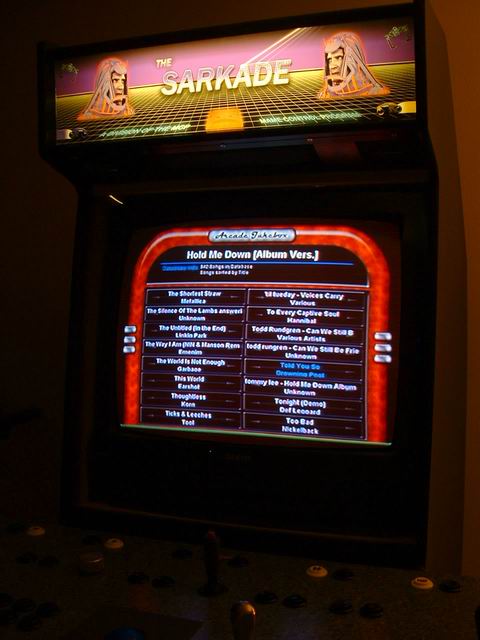
The marquee took about a week to plan and design, another week for Kinko's to print it out. There are pre-made marquees available for purchase on the Web, but I wanted something original. I opted for a Tron theme, and hammered out a design in Photoshop. After I had what I wanted, I went to Kinko's (or FedEx Kinko's now) and had them print out my marquee on translucent film. The cost was just under 20 bucks, which is pretty good considering buying one on the web is like $30 not including shipping. The only complaint I have is that the colors weren't even close to what the original was in terms of the cyan channel. For some reason -- I don't know if they're printer was running out of blue ink or I wasn't using print-safe colors in my design -- it ended coming out way too purple. The background sky has hardly any blue to it like I had designed, and even the blue lightcycle on the left came out violet. To the casual eye, however, not a big deal. I cut it to size, sandwiched it between two pieces of Plexiglas the same size, and attached it using marquee holder from Happ. If you opt to buy it from them, beware -- unknown to me, they ship it two pieces 6' long, and the shipping comes to almost 20 dollars for packages of that length. It's only black plastic with a curve (think of the letter J) -- I'm sure there's something similar to be found out there at a Home Depot or something.

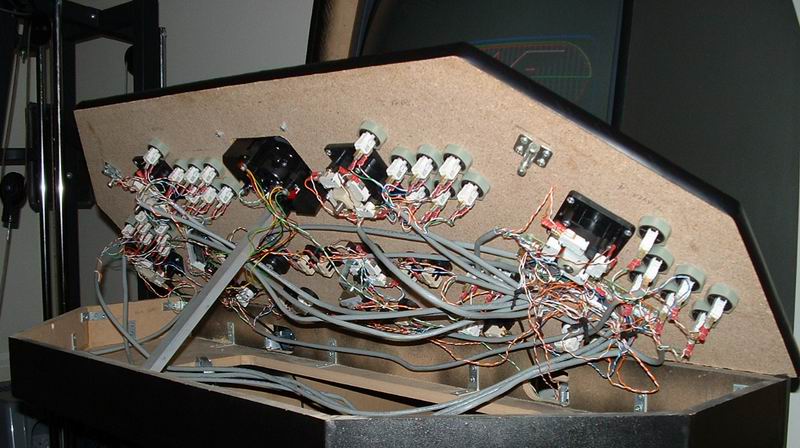
A few electrical details needed to be finished before hook up. Mainly, the trackball LEDs and the coin insert LEDs as well as the coin drop switch to be connected to the IPac. I hot glued the LEDs in place and soldered the wires. I initially used two 5v blue intensity LEDs from radio shack which glowed very bright -- for about a half second before they went really dim and started to smell. Unfortunately, I used a power connector from an old case fan. I've used the PC power supply before in the same manner to light mod my XBox, so I wasn't worried. I forgot, though, that on the XBox I used the yellow, 5 volt wire and one of the black ground wires. The red wire is 12 volts, I thought the yellow one was. After I hooked two more up, I noticed it didn't glow as well as I wanted, and ended up connecting two more. I put the correct amount of resistors to the blue LEDs, but the yellow ones I connected in parallel. I didn't know what the correct amperage values are for them since they were loose in a pack, but they work fine. After all these wires were connected, I cut them all and installed quick disconnects to allow me to take off the control panel when needed.
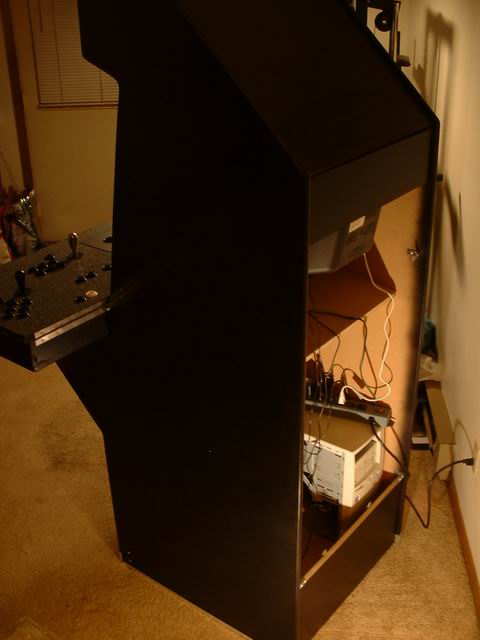
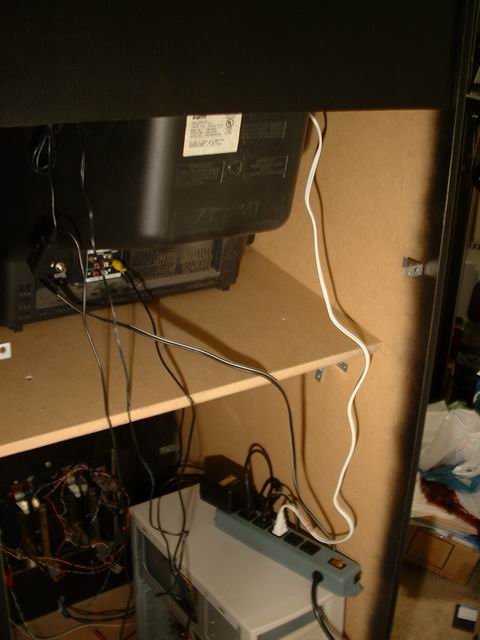
I have turned the PC around since I took the picture below. That way I can turn the main power and PC power on and off by simply reaching in through the coin door rather that opening up the back all the time. It's also easier to add ROMs and programs and such through the CDRom. I have an ethernet cable hooked up to it and running out the back should I need to network it to my other PC and change things around. That way I can configure screens that are too big for 640x480 and also not have to try to read small fonts, which come through really fuzzy -- which is why we don't use TVs for monitors.

I connected a mouse and a keyboard. I chose a keyboard that glows blue to match the trackball. I really don't need a mouse since there is a trackball, but it's still necessary in terms of and left and right clicking, as I would have to set those up as shift buttons and that would be a little impractical.

After that it was just a matter of setting up MAME and the ROMs on the machine. I'm going to put the MameWah frontend program for command line MAME instead of using the MAME32 interface -- it's much more customizable not only in terms of button functions but in using it to launch other programs like emulators (like for NES, SNES, Sega, etc) and even in the design of the interface screens and fonts. It will even play random MP3's in the background if so chosen. I also found another program called Arcade Jukebox. It's a bit on the simple side, but does the job, and is customizable so that it can be used like a real jukebox, not just an MP3 player -- it can be used to accept coins for play credits.
Lightguns were installed and work great, they were purchased back when they were like 30 bucks each, I see the price has gone up considerably since then. The guns can be used to play not only arcade games like Time Crisis, Area 51 and CarnEvil, but PC games like House of The Dead 1 and 2. The front bezel was made from Plexiglas. I masked off the viewing area and spray painted the outside with the same color paint as the cabinet -- black metal flake. I installed an EL light strip on the inside of the control box so I could see when I opened it -- as well as going along with the whole Tron theme.