RC Aircraft
Mercury 330 3D Stunt Plane
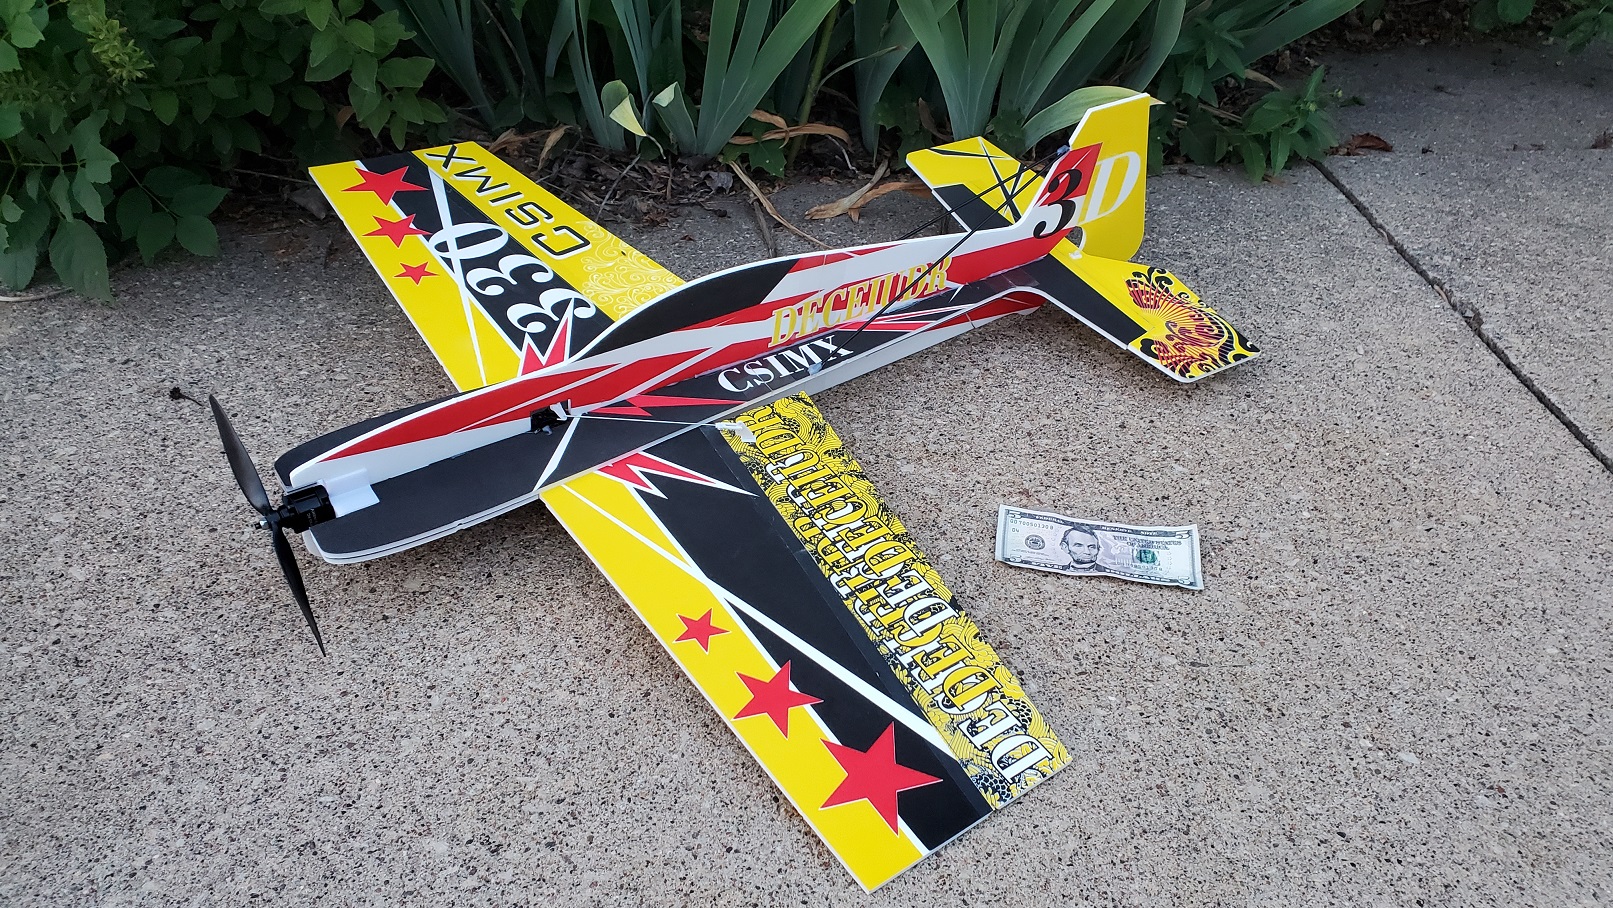
When browsing AliExpress, I saw a 3D acrobatic plane for cheap: 3D Mercury Fixed-wing Aerobatic Magic Board Plane. (At least it was cheap; it was $37 when I bought it months ago, now it's around $50, yay tariffs.) I figured this would be good for learning 3D stunts and all that, being a foamboard plane that was big and light, so I wouldn't have to worry about crashing too much. I ordered it and let it sit in a box for a few months before finally deciding to put it together, after looking to make sure all the pieces where there. It turns out the "magic board" or whatever foamboard is actually pretty strong and dense, and can bend without breaking unlike dollar store craft foamboard I've used in previous models.
Unfortunately, the kit doesn't come with instructions. Some of the stores selling it will put in the description, "Email us for a build video", which is a lie. However, it's actually not too hard to figure out after looking at the completed pictures of it in the description. It comes with the main wings, horizontal fuselage, and vertical fuselage sections all split in half so they can ship it in a smaller box. It's easy enough to rejoin them all with some hot glue and some clear packing tape. From there it's a matter of joining and hot gluing those pieces while also gluing the servos in the correct spots, then adding the control horns and rods.
It came clear when putting it together that some modifications would be required to make it fly better, as well as from some comments on the product pages about the tail twisting.
Modifications
Control Surfaces
The first thing I did was just to completely cut the ailerons, elevators, and rudder from the foam and reattach them with hinge tape. They are attached with a thin layer of foam, but it's a bit too stiff for my liking, as I want them to have as little resistance as possible so they are quite responsive.
Main Wing Support
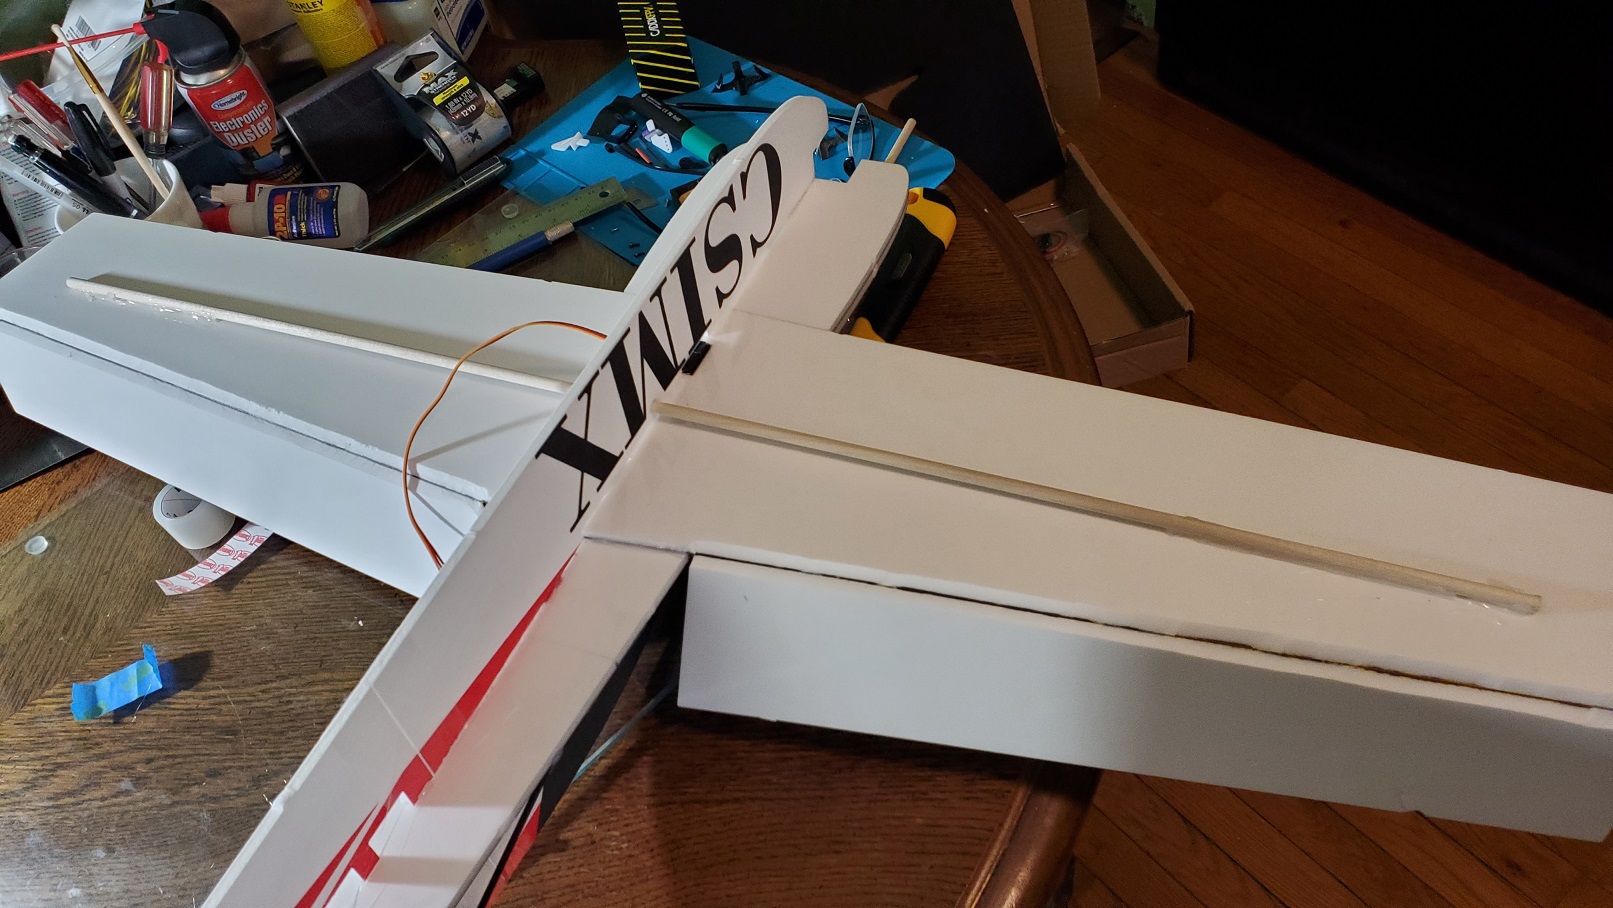
The kit comes with with two 3mm carbon fiber rods, and one is supposed to be used for the wing supports, but it's completely useless since it's so thin. Instead I bought a 3-foot piece of 1/4" hardwood dowel from the hardware store for like a dollar, cut off 5 inches, and glued that to the bottom of the main wing, putting the dowel through the pre-cut hole in the vertical fuselage. Sure you could use carbon fiber rod instead, but that stuff isn't that cheap or readily available, and this works just as well.
Tail Supports
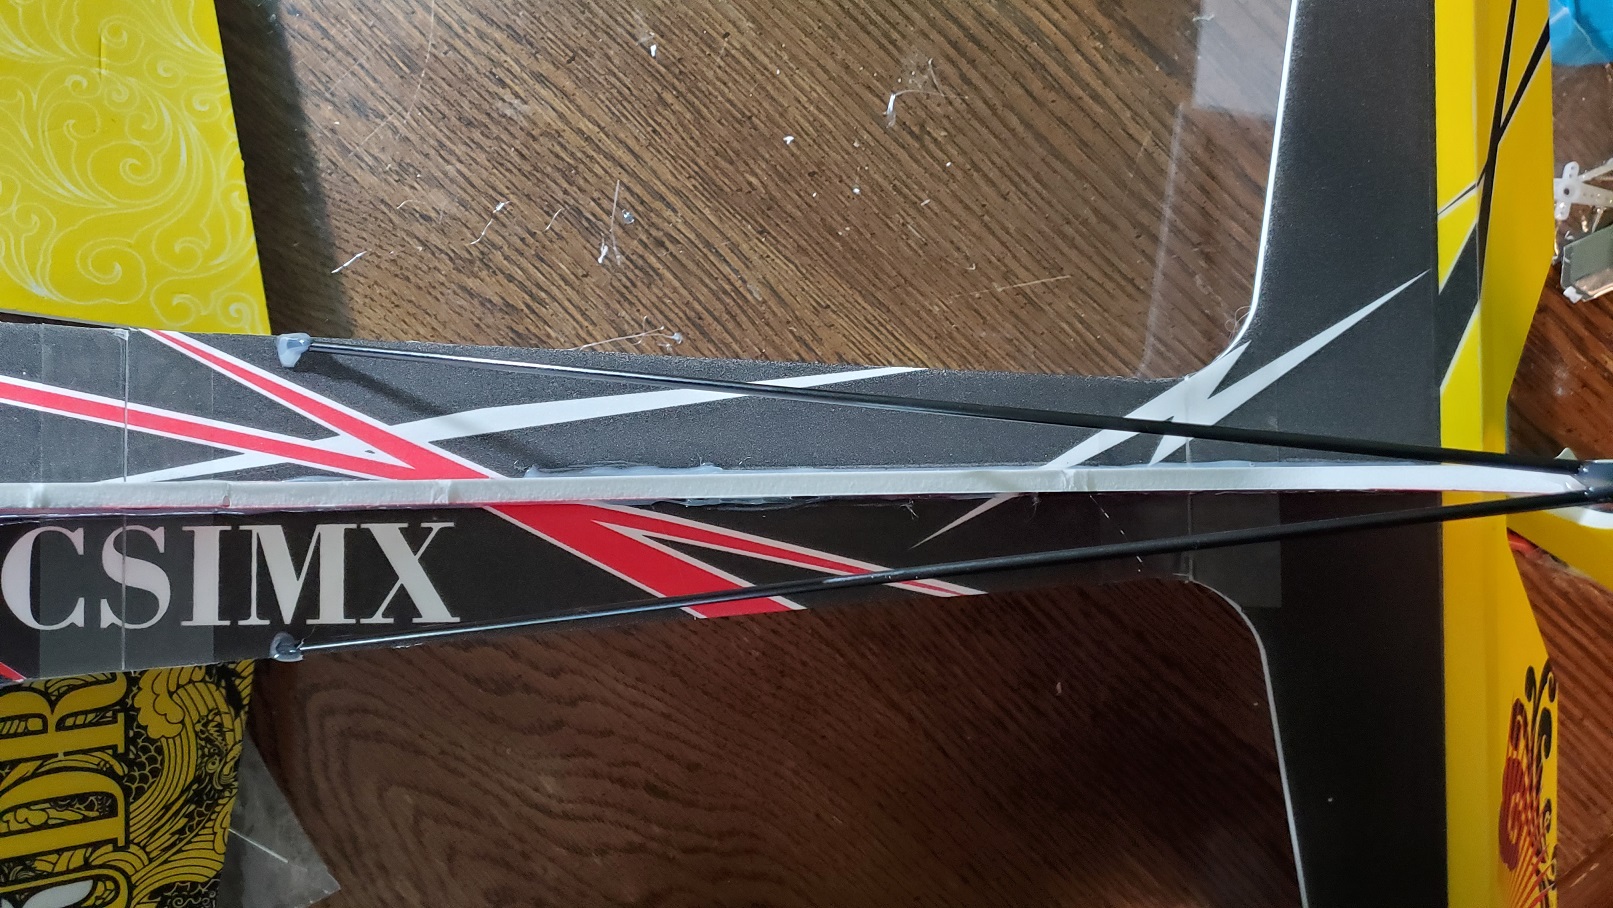
The included carbon fiber rod is useful for the horizontal tail section, since it's not very long, so I cut that to an appropriate length and glued it to the underside of the horizontal fuselage tail section.
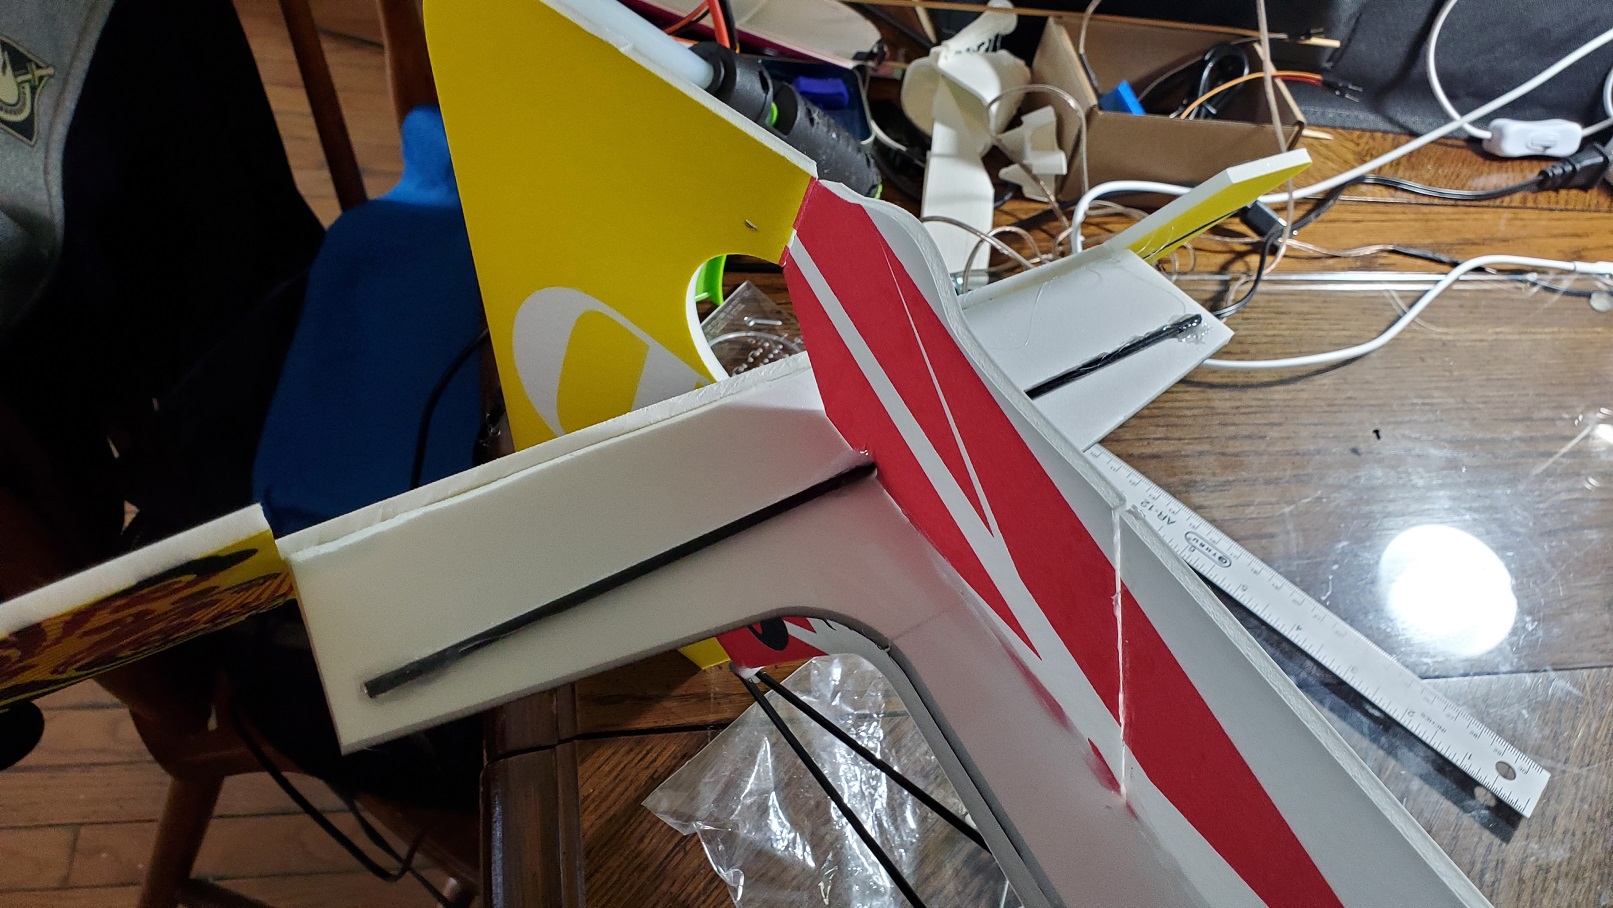
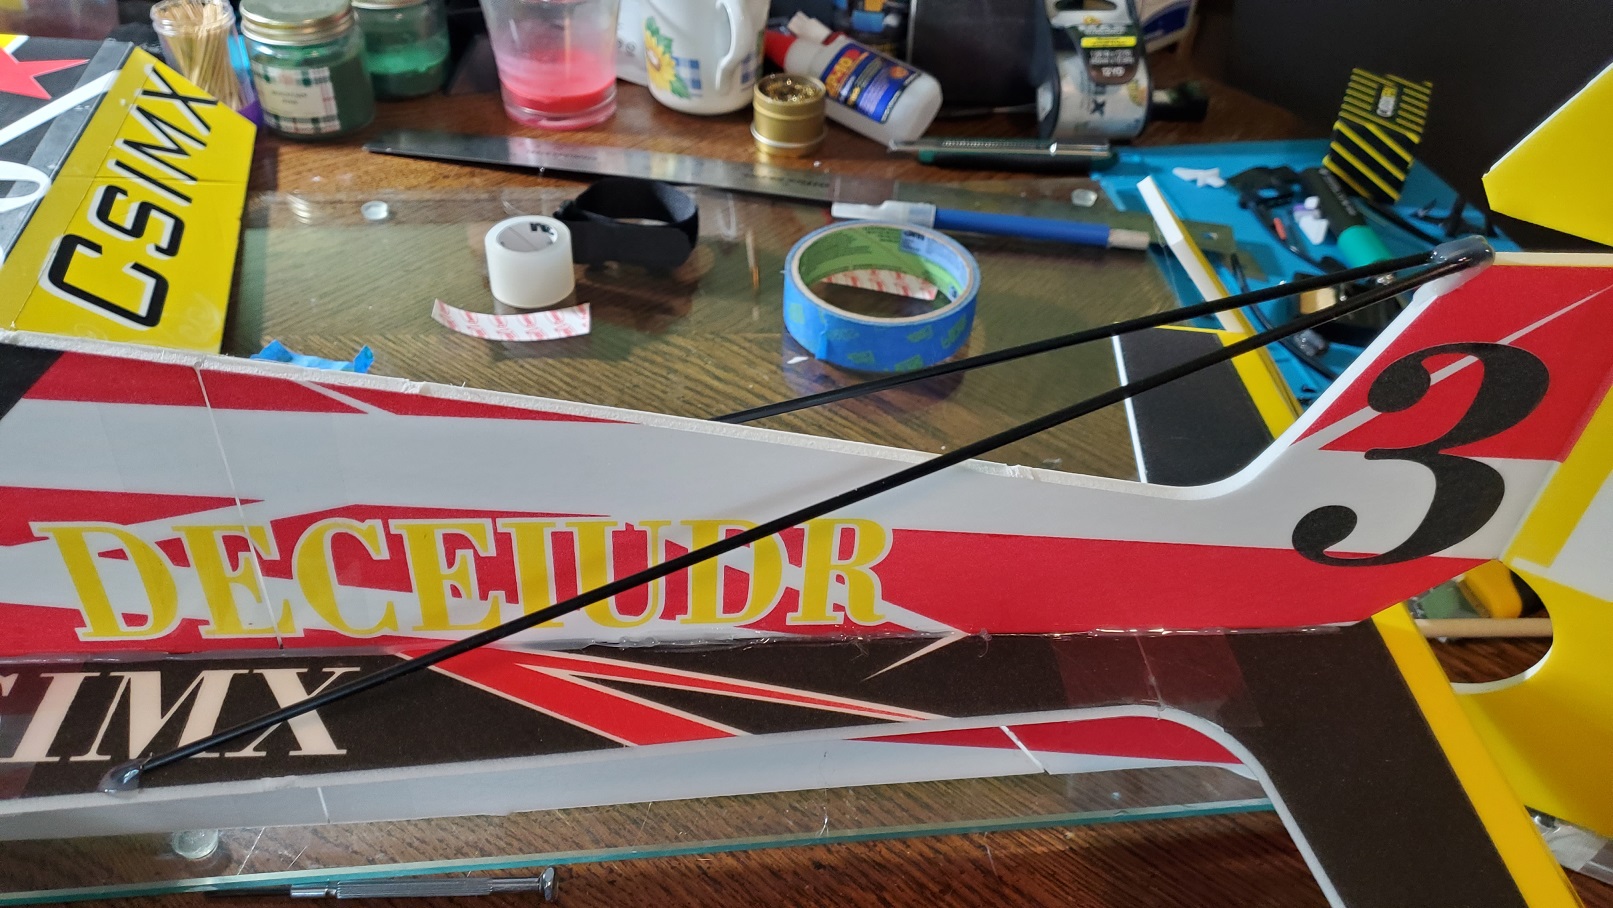
Some of the comments on the product pages mentioned the tail of the fuselage wasn't very strong and would twist easily in flight. I decided I wanted to rectfiy this immedately before trying it for myself, for it did indeed twist quite easily just testing it by hand. Some people were using dowels along where the horizontal and vertical fuselage sections meet, others used some extra foamboard as braces. I felt the first option was probably better looking but not as strong, and the second option was probably stronger but looked terrible. Instead, since I already had the extra piece of 3mm carbon fiber rod not being used on the wings, I cut that in half, and then glued it from the top of the tail onto the middle of the horizontal fuselage to act as supports. This works quite well while also being aesthetically pleasing.
Painting
Since this is a cheap kit, they decided to do away with any frills like two-sided printing. As a result, the right half of the vertical fuselage and tail is complelely blank. This really makes it look cheap, and it bothered me to no end, so I decided to paint it on that side as well with the same design, sans any lettering. I think it turned out quite well, and makes the plane look so much better in the air.

Transmitter Settings
Rates
I use a 3-way switch on the transmitter to select between low rates (60% weight, 20% expo), medium rate (80% weight, 30% expo) and high rates (100% weight, 30% expo) for ailerons, elevator, and rudder. Initially I started with 40% weight for low, up to 80% for high, but found I just used medium and never the low rates, so I bumped it up.
Torque Roll Mitigation
At first, I used a 3-way switch which make the ailerons bank to the right by 10% and 20%, and I just basically left it at the 10% position when flying. However, I wanted to make it work proportional to how much throttle was being given, which would help a bit when trying to hover in place.
This adds aileron to the right to mitigate torque roll, taking into account the amount of throttle being used, as well as what rate is being used. The rates are selectable on three-way switch SB (these are set up in INPUTS), and the automatic torque roll is applied when three way switch SC is DOWN. When SC is in the neutral position, a set amount of 15 is added to aileron right no matter what throttle/rate (this is what I was using previously). When SC is UP, no aileron right is added.
- Maiden Flight